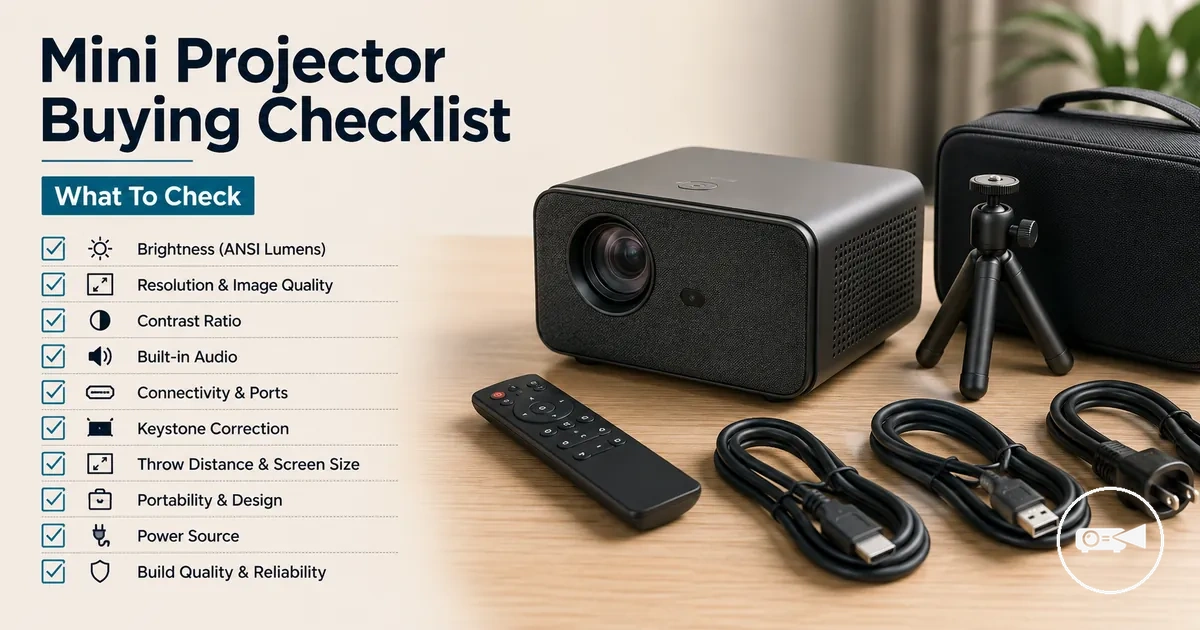
Mini Projector Buying Checklist for Choosing the Right Model
A mini projector buying checklist is a decision tool for matching a model to its use case, room conditions, placement, connected devices, power needs, accessories, and total value. The buying decision should begin with practical fit rather than product popularity or promotional claims.
The buying decision should begin with practical fit rather than product popularity or promotional claims.
A mini projector used in a dark bedroom has different requirements from one used for presentations in a room with windows. A compact model may also be unsuitable when its throw distance cannot produce the required screen size from the available position. The main criteria families are room fit, specifications, placement, compatibility, power, accessories, and value.
Check the following requirements before comparing products or offers.
Choose a mini projector only after confirming how and where it will be used. Check the following requirements before comparing products or offers.
- Match brightness to room conditions: Check whether the mini projector will operate in a dark, dim, or illuminated room. Epson's projector guidance states that brighter output is required as ambient light increases; the risk is selecting a low-output model for a bright space, so compare brightness specifications stated in the same recognised unit and under comparable test conditions.
- Check native resolution rather than accepted input: Confirm the projector's native resolution, which is the physical pixel count used to form the image. BenQ distinguishes native resolution from supported input resolution; the risk is mistaking acceptance of a higher-resolution signal for projection at that resolution, so choose the native pixel category that provides suitable clarity for the planned screen size and content.
- Verify throw distance and screen size together: Compare the available projector-to-wall distance with the manufacturer's projection-distance table or calculator. Epson defines throw distance as the distance between the projector and the image and states that room configuration affects image size and placement; the risk is producing an image that is too small, too large, or difficult to focus, so select a model whose documented distance range fits the planned position.
- Confirm device and audio compatibility: List the devices that must connect and verify matching interfaces such as HDMI, USB, Wi-Fi, AirPlay, or Miracast, including any required adapters. The risk is assuming that wireless mirroring, streaming services, or audio output will operate with every phone or laptop, so choose only when the model documentation identifies the required connection method, supported device platform, content source, and audio route.
- Match power to the planned session: Decide whether the mini projector will run from mains power, an internal battery, or a documented external power source. The risk is losing power before a film or presentation ends, so choose a model whose stated battery runtime covers the intended session or whose specified input supports continuous powered use.
- Include accessories and purchase conditions in the value check: Confirm whether the usable setup requires a tripod, stand, carrying case, screen, cable, adapter, streaming device, or external speaker. The risk is treating the projector price as the complete cost, so compare offers by the full setup cost, included accessories, merchant warranty terms, and stated return conditions.
Table of Contents
Mini Projector Use Requirements Before Comparing Options
Mini projector use requirements should define the comparison before features or offers are reviewed. The main decision value is personal fit: the intended use case, room, viewing purpose, setup frequency, and practical constraints determine which projector options remain suitable.
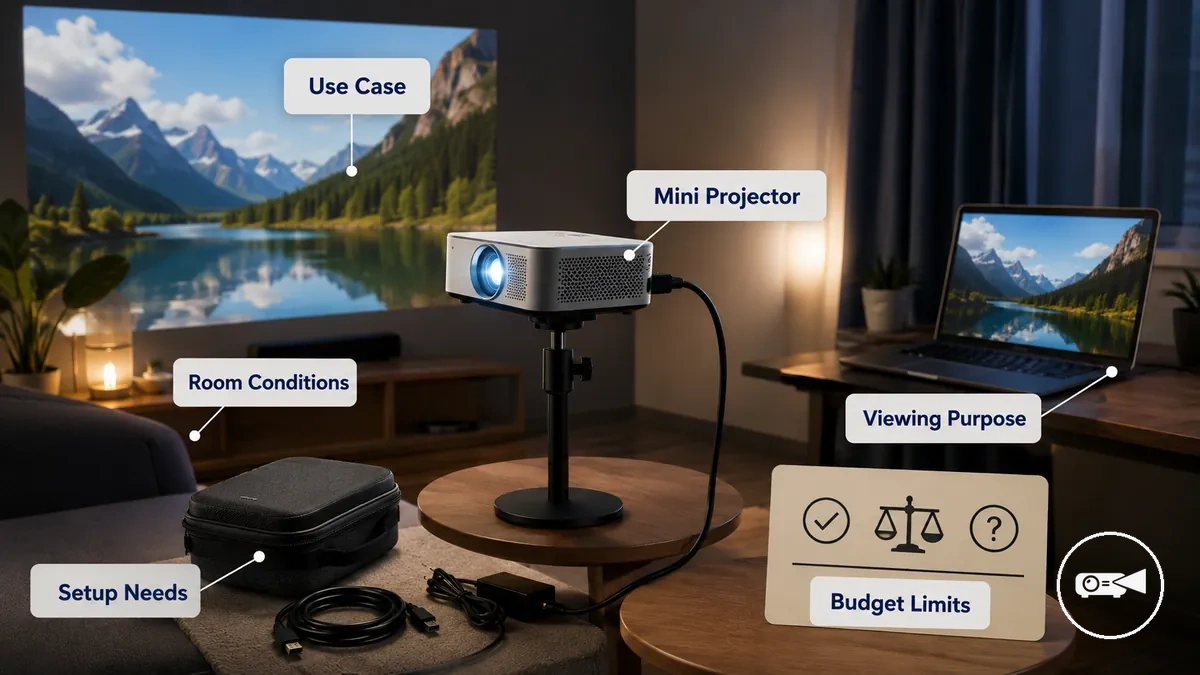
A mini projector used for occasional films in a dark room has a different requirement profile from a portable projector used for presentations or frequent travel. Room conditions can be classified as dark, dim, or exposed to regular ambient light, while the viewing purpose can prioritise entertainment, work, gaming, or mixed use. For example, a popular compact projector may still be a poor fit when its placement, power source, or accessory requirements conflict with the planned setup.
- Use case: Identify whether the mini projector is mainly for films, presentations, gaming, travel, or mixed use; the risk is comparing features that do not support the primary viewing purpose, so retain options designed for that activity.
- Room conditions: Classify the viewing space as dark, dim, or regularly exposed to ambient light; the risk is choosing an option suited only to darker conditions, so compare models within the room category where they will operate.
- Placement constraints: Record the available projection position, viewing surface, and whether a stand or tripod can be used; the risk is selecting a projector that cannot create a practical image from the available location, so retain options that fit the intended setup.
- Portability and setup frequency: Decide whether the projector will remain in one room or move between locations; the risk is prioritising a smaller body while overlooking repeated cable, stand, case, and alignment needs, so judge portability by the complete setup.
- Budget and trade-offs: Set a budget for the usable system, including required accessories and adapters; the risk is comparing projector prices without accounting for the equipment needed to complete the setup, so evaluate total practical cost.
These use requirements narrow the decision without predicting one suitable choice for every buyer, because the controlling constraint changes with the room, device setup, and viewing purpose. The broader mini projector guide can support the next stage once the personal-fit boundary is clear.
Room, Viewing Purpose, and Setup Frequency
Room, viewing purpose, and setup frequency determine which mini projector features deserve priority before detailed specification comparisons. Match the viewing environment, content type, and portability needs to the intended use case first, then use that local check to decide which features should influence the buying decision.
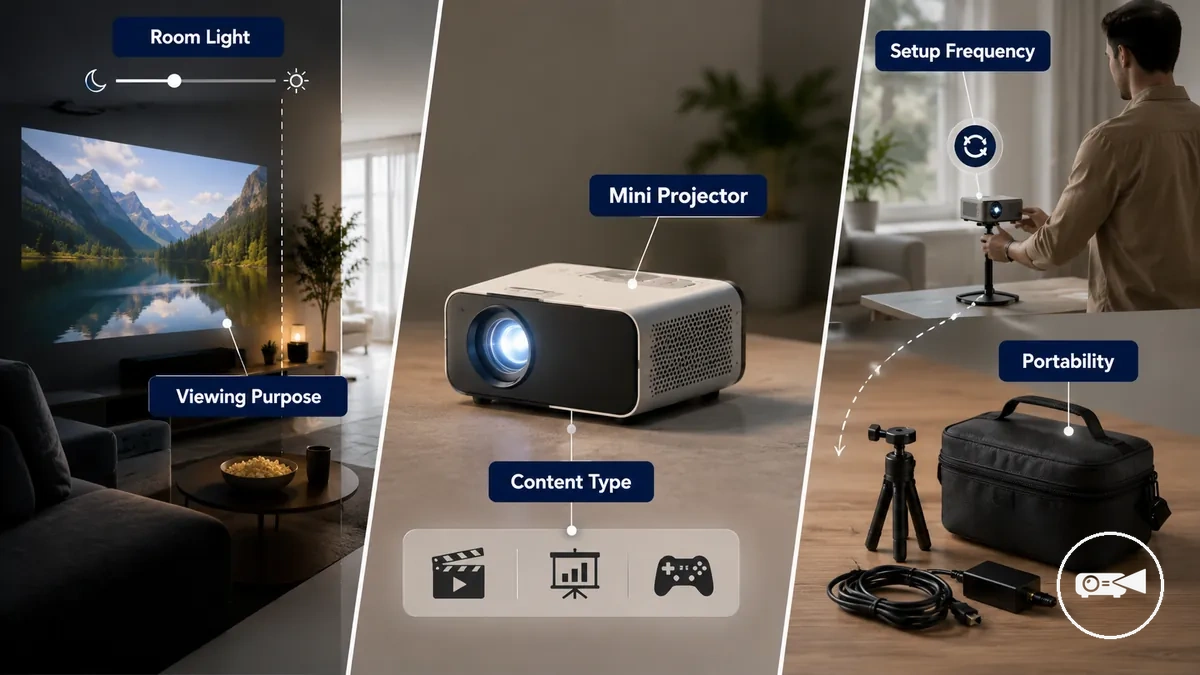
- Dark or small room: Prioritise features that suit compact viewing spaces, because controlled lighting reduces the need to compare brightness before other local requirements.
- Brighter or shared room: Prioritise features that support changing viewing environments, then evaluate brightness in the dedicated specification section rather than treating it as the first buying criterion.
- Frequent setup: If the mini projector is moved between rooms or travel locations, portability, simple storage, and quick setup become higher priorities than features intended for permanent placement.
- Viewing purpose: Match the feature priority to the planned content type, such as films, presentations, or casual gaming, because each viewing purpose changes the buying threshold.
- Occasional use: If setup frequency is low, focus on features that fit the planned room and viewing environment instead of paying for capabilities that are unlikely to be used regularly.
For example, a buyer who carries a mini projector between meeting rooms benefits more from portable storage and repeated setup convenience than from features designed for a fixed home viewing setup. Detailed evaluation of brightness, resolution, and connectivity belongs in later sections because those features should be compared only after the room, viewing purpose, and setup frequency have established the correct priority order.
Budget Range and Acceptable Trade-offs
Budget range and acceptable trade-offs determine which mini projector features should remain essential before comparing offers. Each price band changes expectations for must-have features, accessory cost, and acceptable compromise, so define those priorities before making the buying decision.
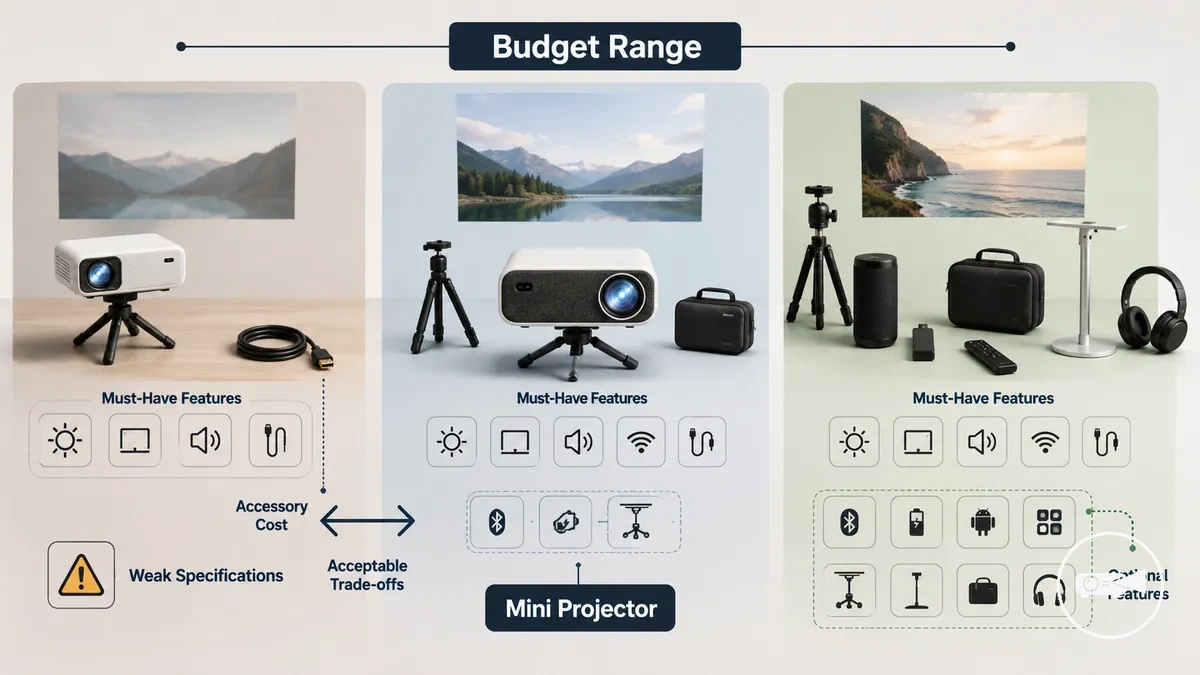
| Budget or cost factor | Likely trade-off | What to verify | Decision cue |
|---|---|---|---|
| Lower budget range | Fewer must-have features and a higher risk of weak specifications | Confirm that essential viewing functions remain available without relying on optional accessories | Choose only if the missing features are optional rather than required |
| Mid price band | More balanced features with moderate compromise | Check whether accessory cost increases the total ownership cost | Compare the complete setup instead of the projector price alone |
| Higher budget range | More optional features and fewer practical compromises | Verify that additional features support the intended use instead of remaining unused | Prioritise practical value over extra specifications |
For example, a mini projector with a lower purchase cost can become the less practical option if separate accessories are needed before normal use or if weak specifications reduce usability for the planned viewing environment. Review the broader value and limitations before comparing offers so the final decision reflects overall usability rather than the initial price band.
Image Specifications That Affect Viewing Quality
Image specifications determine viewing quality when brightness, contrast, native resolution, and focus are evaluated together under the intended viewing conditions rather than by a single headline specification. A mini projector with balanced image specifications is more likely to deliver consistent picture quality than one promoted primarily by an inflated specification claim. Use these combined criteria as the basis for comparing models.
Use these combined criteria as the basis for comparing models.
Brightness should match the expected ambient light because higher room light reduces visible image clarity, while contrast improves the distinction between bright and dark image areas. Native resolution defines the projector's actual image detail, making projected clarity more consistent as screen size increases within the projector's intended use. Focus should remain acceptably sharp across most of the projected image after adjustment, while keystone correction is best treated as image alignment rather than a substitute for optical focus. For example, a projector that appears sharp on a small screen can lose visible clarity when projected much larger if its native resolution remains unchanged.
The criteria below provide a practical way to compare image specifications without relying on marketing claims alone.
The criteria below provide a practical way to compare image specifications without relying on marketing claims alone. Judge each attribute under viewing conditions similar to the room, screen size, and projection surface where the mini projector will normally be used.
| Attribute/criterion | What to check | Why it matters | Safe decision cue |
|---|---|---|---|
| Brightness | Suitability for the expected ambient light | Determines image visibility in the intended environment | Assess brightness under lighting conditions similar to normal use |
| Contrast | Separation between dark and bright image areas | Improves perceived image depth and detail | Compare visible picture quality instead of headline specification claims |
| Native resolution | Actual display resolution of the projector | Determines projected clarity, especially as screen size increases | Prioritise native resolution over unsupported marketing descriptions |
| Focus | Sharpness across the projected image after adjustment | Maintains consistent viewing clarity | Confirm acceptable focus across the intended viewing area |
| Viewing conditions | Room light, screen size, surface quality, and projector placement | These conditions determine how image specifications appear in practice | Evaluate the complete viewing setup rather than a single specification |
Brightness, Ambient Light, and Contrast Checks
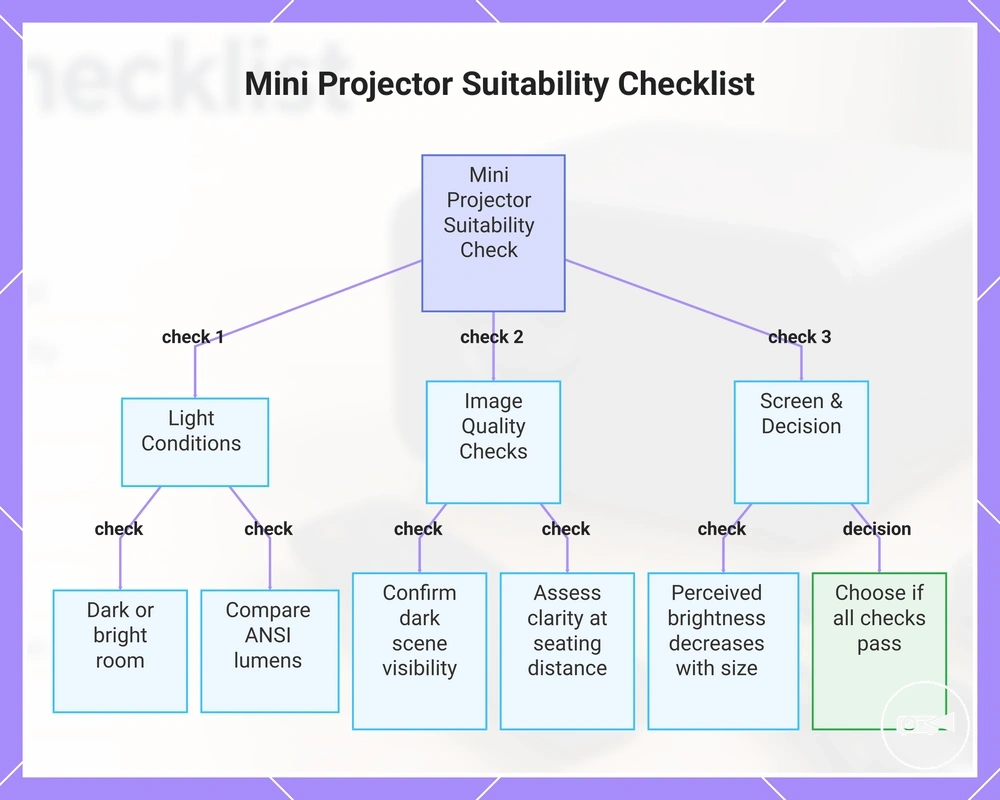
Brightness should match the intended room because higher ambient light reduces image visibility and makes contrast harder to perceive. Compare lumens only when they are measured using the same method, and judge them alongside room light, viewing distance, and screen size rather than as a standalone specification. Use the checklist below to decide whether a mini projector suits your viewing environment.
- Room light: Check whether the projector will be used mainly in a dark room or in brighter daytime conditions because brighter environments require more usable light output to maintain image visibility.
- Brightness: Compare lumens only when the measurement standard is clearly identified, such as ANSI lumens, so the figures represent comparable light output.
- Contrast: Confirm that dark scenes remain distinguishable under the expected ambient light instead of relying only on a claimed contrast specification.
- Viewing distance: Assess image clarity from the normal seating position because greater viewing distance can reduce the visibility of fine detail.
- Screen size: Expect perceived brightness to decrease as the projected image becomes larger under the same room conditions.
- Decision: Choose the mini projector only if its brightness, contrast, and viewing distance remain suitable for the intended room light.
For example, a projector that provides comfortable image visibility in a dark room may appear washed out during daytime viewing unless room light is reduced or the projected image is made smaller. For a clearer explanation of comparable light-output measurements, see brightness and lumens before comparing advertised specifications.
For a clearer explanation of comparable light-output measurements, see brightness and lumens before comparing advertised specifications.
This chart shows the key checks to decide whether a mini projector is suitable for your viewing environment, including light conditions, image quality, and screen considerations.
Native Resolution and Picture Clarity Checks
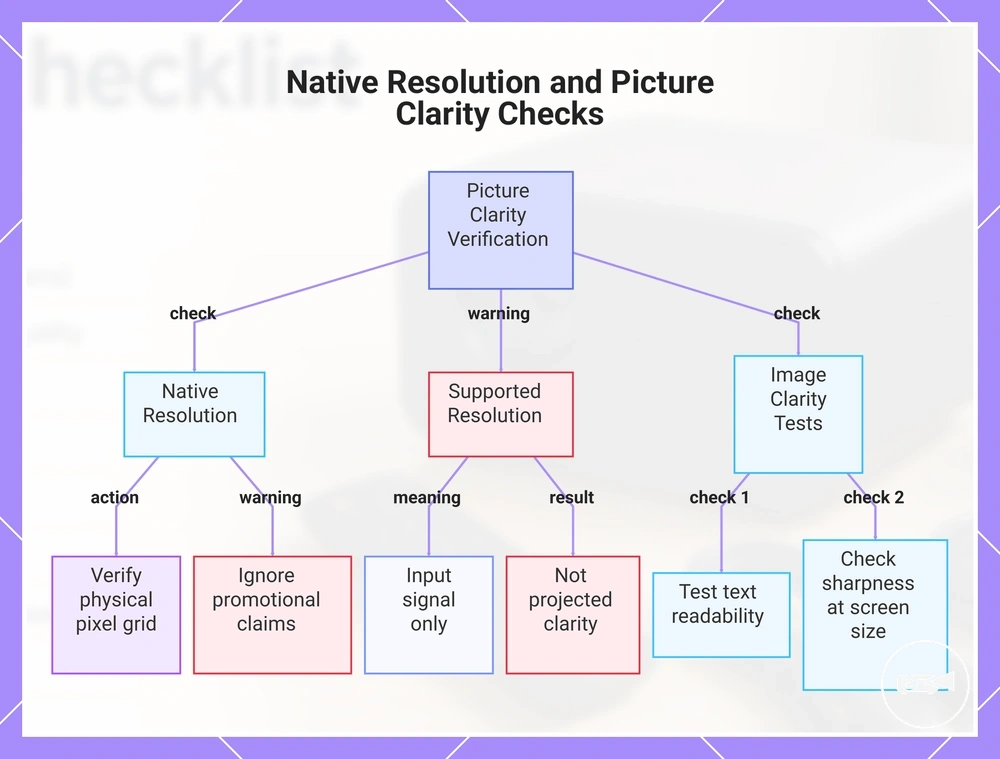
Native resolution shows the pixel grid a mini projector displays directly, while supported resolution only shows the input signal it can accept. A resolution label does not by itself confirm a sharp image, so verify the native specification before judging picture clarity.
- Native resolution: Check the projector’s stated physical pixel resolution rather than relying on a broader promotional resolution claim.
- Supported resolution: Treat this value as display support for an incoming signal, not as the resolution projected on the screen.
- Image sharpness: Confirm that edges, subtitles, and fine details remain distinct after the projector is correctly focused and positioned.
- Screen size: Expect image sharpness to decrease when the same native pixel grid is spread across a larger projected image.
- Text readability: Test menus or small text at the intended screen size and viewing distance because readable video does not confirm readable text.
- Decision: Accept the resolution claim only when native resolution, source quality, focus, and planned screen size produce suitable projected clarity together.
For example, a mini projector may accept a 1080p input while displaying it through a lower native resolution, so playback support does not confirm the same level of visible detail. The practical boundary is whether text and fine edges remain clear at the intended screen size, not whether the source file plays.
The practical boundary is whether text and fine edges remain clear at the intended screen size, not whether the source file plays.
Use the difference between native output and input support when comparing resolution and image quality, because promotional labels can describe accepted content rather than actual projected clarity.
This chart shows how to verify picture clarity by checking native resolution, understanding supported resolution, and performing image clarity tests.
This chart shows how to verify picture clarity by checking native resolution, understanding supported resolution, and performing image clarity tests.
Placement Fit, Throw Distance, and Screen Size
Placement fit is suitable when a mini projector can produce the intended screen size from the available projection distance without exceeding the usable wall surface. Throw distance and image size are linked by the model’s lens design, so the buying decision should start with room depth, projector position, and the clear viewing area.
Throw distance is measured from the projector lens to the screen or wall surface.
Throw distance is measured from the projector lens to the screen or wall surface. A larger image normally requires a longer projection distance for the same mini projector, while a shorter room requires either a smaller image or a model with a shorter stated throw range. Adjustment limits such as optical zoom, digital zoom, keystone correction, and placement offset can refine the image, but they do not replace the physical distance or surface area required by the model.
| Attribute or criterion | What to check | Why it matters | Safe decision cue |
|---|---|---|---|
| Projector placement | Confirm a stable position with a clear projection path and enough space for ventilation and viewing. | Off-centre or obstructed placement can reduce the usable image area and increase the need for correction. | Choose the mini projector only when its normal position fits the room without blocking movement or the image path. |
| Throw distance | Compare the available lens-to-surface distance with the minimum and maximum distances stated for the model. | The same room depth can produce different image sizes across projectors with different lens designs. | Reject the model when the intended screen size requires more or less distance than the room provides. |
| Screen size | Check the projected image width and height as well as the advertised diagonal measurement. | A diagonal figure can exceed the usable wall surface once the image aspect ratio is applied. | Select an image size that remains fully within the clear surface and preserves acceptable brightness and clarity. |
| Wall surface | Check the available width, height, flatness, colour, and nearby obstructions. | An uneven, dark, or interrupted wall surface can reduce clarity and limit the usable projection area. | Use a smaller image or a suitable screen when the wall cannot support the intended image dimensions. |
| Adjustment limits | Verify the model-specific zoom range, focus range, keystone range, and placement offset in its documentation. | Heavy digital correction can reduce the active image area or visible detail. | Prefer a placement that needs only minor correction and remains inside every stated adjustment range. |
For example, a small room may support only a compact image from a short projection distance, while a temporary setup also requires a repeatable clear surface and stable projector position. A larger viewing space can support a larger image only when room depth, wall dimensions, brightness, and the model’s adjustment limits remain suitable together.
Use the model-specific relationship between screen size and throw distance to confirm placement fit before purchase.
Use the model-specific relationship between screen size and throw distance to confirm placement fit before purchase. Treat a promoted image size as a possible outcome only when its stated projection distance, aspect ratio, and placement conditions match the intended room.
Projection Distance and Maximum Usable Image Size
Projection distance sets the possible image width, but the maximum usable image size is the largest result that remains focused, bright, and clear in the room. A longer throw distance usually produces a larger image for the same mini projector, so compare the available room depth with the model’s stated throw ratio and focus range before accepting its advertised maximum size.
| Attribute or criterion | What to check | Why it matters | Safe decision cue |
|---|---|---|---|
| Throw distance | Measure from the projector lens to the intended projection surface and compare it with the model-specific distance range. | The same mini projector produces a larger image as projection distance increases within its supported range. | Use only distances covered by the model’s manual or projection table. |
| Image width | Check the required image width rather than relying only on a diagonal screen-size claim. | Throw ratio links projection distance to image width, so different lens designs produce different widths from the same position. | Accept the projected size only when its width fits the clear surface and room depth. |
| Focus range | Confirm that the intended projection distance remains inside the model’s stated focus range. | An image outside that range may remain soft even after normal focus adjustment. | Choose a smaller projected size or a different model when sharp focus cannot be reached. |
| Brightness loss | Judge brightness and clarity at the intended image size under the room’s expected light conditions. | Spreading the same light output across a larger surface reduces perceived brightness and can make detail harder to see. | Treat the usable screen size as smaller than the advertised maximum when the larger image appears dim or unclear. |
| Room depth | Compare the available lens-to-surface distance with the distance required for the intended image width. | Limited room depth restricts projected size unless the mini projector has a shorter model-specific throw ratio. | Reject an intended size that requires more projection distance than the room provides. |
For example, a mini projector may fill most of a wall at its longest supported projection distance, yet a smaller image may be the maximum usable image size if the larger result falls outside the focus range or shows noticeable brightness loss. Use the largest size that preserves readable text, distinct edges, and sufficient brightness rather than treating the advertised maximum as the preferred size.
Mounting, Tripod, Wall, and Screen Requirements
A mini projector needs separate placement support when its included base cannot hold the required height, angle, or position. Stable mounting affects alignment, focus, and viewing comfort, so check the tripod connection, stand height, wall or screen surface, keystone adjustment, and cable reach before buying.
- Tripod thread: Confirm that the mini projector has a threaded mounting point that matches the selected tripod or projector stand. Choose separate support when the projector lacks a compatible thread or the included base does not hold it steadily.
- Stand height: The stand height is suitable when it places the lens near the intended image position without blocking the viewing area. Choose a taller or adjustable stand when the available furniture would force a steep projection angle.
- Wall or screen: Use a flat, clear wall or a stable screen surface that fits the intended image. A separate screen is useful when the wall is uneven, dark, reflective, or interrupted by fittings.
- Keystone adjustment: Check whether the model offers horizontal, vertical, or combined keystone correction and whether the stated range suits the planned angle. Prefer better physical alignment when the required correction would noticeably reduce the usable image area or clarity.
- Cable reach: Compare the included power and source-cable lengths with the distance to the nearest socket and connected device. Choose longer cables or a different placement support when the included cables cannot reach without crossing the viewing area.
Included accessories are enough when the supplied base or stand keeps the mini projector stable at the required height, the wall or screen is suitable, and every cable reaches its connection point. Separate mounting support, a tripod, a projector stand, a screen, or longer cables are needed when any of those conditions is not met.
Device Connectivity and Playback Compatibility
A mini projector provides device connectivity and playback compatibility when its supported inputs and wireless features match the source device you plan to use. Compare the available HDMI, USB, Wi-Fi, Bluetooth, adapter requirements, audio output, and streaming support before buying so you can confirm a complete playback path.
A mini projector provides device connectivity and playback compatibility when its supported inputs and wireless features match the source device you plan to use.
HDMI provides direct video playback when both devices have compatible HDMI connections, while phones, tablets, or laptops with different connectors require a video-capable adapter. USB playback works only when the projector supports the connected storage device and the media file format, and a power-only USB port does not function as a video input. Wi-Fi can support screen mirroring or built-in streaming when the projector and source device use compatible wireless standards, while Bluetooth is commonly intended for audio output rather than video transmission.
Wireless support does not mean every phone, laptop, or streaming app is compatible.
Wireless support does not mean every phone, laptop, or streaming app is compatible. Protected streaming services, unsupported mirroring protocols, or unsupported app versions can prevent wireless playback even when Wi-Fi is available, so verify the complete playback route before choosing a model.
| Device or source | Connection method | Extra item needed | Risk or decision |
|---|---|---|---|
| Laptop or desktop | HDMI | None with matching HDMI ports; otherwise a video-capable adapter | Confirm the computer outputs video through the selected connection. |
| Phone or tablet | HDMI adapter or supported Wi-Fi mirroring | Compatible adapter, cable, or supported wireless protocol | Verify connector type and wireless mirroring support before purchase. |
| USB storage device | USB media playback | None when supported; otherwise a separate media player | Check that the projector supports both the storage device and file format. |
| Streaming device | HDMI | Power source if required by the streaming device | Confirm app availability and streaming restrictions. |
| External speaker or headphones | Bluetooth or wired audio output | Compatible cable when Bluetooth audio is unavailable | Confirm Bluetooth supports audio output rather than video transmission. |
For a detailed comparison of available wired and wireless features, review the projector's connectivity options before comparing individual models.
For a detailed comparison of available wired and wireless features, review the projector's connectivity options before comparing individual models.
Use the compatibility checklist to confirm that every intended source device has a supported connection method, any required adapter, the correct audio output, and no streaming limitation that would affect normal playback.
HDMI, USB, Wi-Fi, and Bluetooth Support
HDMI, USB, Wi-Fi, and Bluetooth serve different functions on a mini projector, so each connection type must match the required playback task. Check whether HDMI provides video input, USB supports media playback, Wi-Fi supports screen mirroring or network streaming, and Bluetooth provides audio output.
- HDMI: Confirm that HDMI works as a video input from an external source. Choose the mini projector only when the source has a matching HDMI output or a compatible video adapter is available.
- USB: Check whether the USB port supports media playback from stored files, supplies power only, or performs both functions. A USB label alone does not confirm video input or support for every file format.
- Wi-Fi screen mirroring: Verify that the mini projector and source device support the same wireless mirroring method. Without a matching method, Wi-Fi does not provide screen mirroring.
- Wi-Fi network streaming: Confirm whether Wi-Fi supports built-in streaming apps, network casting, or device mirroring only. Select the model only when its stated network function matches the intended playback method.
- Bluetooth: Check that Bluetooth supports the required audio output to a compatible speaker or headphones. Bluetooth speaker pairing is an audio function, not a video connectivity method.
- Buying decision: Treat each port or wireless label as a function-specific condition rather than a general compatibility guarantee. The mini projector is suitable only when every required task has a stated and supported connection type.
Phone, Laptop, Streaming, and External Audio Support
A mini projector is compatible only when each planned source device has a supported connection method and any required adapter, power source, app access, or audio output. Check the phone, laptop, streaming device, and speaker setup separately because support for one source does not confirm support for the others.
| Device/source | Connection method | Extra item needed | Risk or decision |
|---|---|---|---|
| Phone | Supported wireless mirroring or a wired video connection | A video-capable adapter when the phone connector does not match the projector input | Confirm that the phone supports the selected output or mirroring method; a charging adapter alone does not provide video. |
| Laptop | HDMI input on the mini projector | An HDMI cable or a video-capable adapter when the laptop uses another output connector | Use the setup only when the laptop can send video through the selected port and the projector accepts that input. |
| Streaming stick | HDMI for video and a separate power connection when required | A suitable USB or mains power source | Check physical port access, power needs, network access, and app availability before treating the streaming stick as a complete playback source. |
| Protected streaming app | A supported built-in app, authorised casting method, or direct HDMI playback | An approved playback device or service-compatible app when mirroring is restricted | Protected content can block screen mirroring or recording, so wireless support does not confirm playback for every streaming app. |
| External audio setup | Bluetooth audio output or a compatible wired audio output | A speaker, headphones, or an audio cable that matches the available output | Confirm that the mini projector can send audio through the chosen connection; a speaker connection does not replace the separate video path. |
Portability, Power, and Accessory Readiness
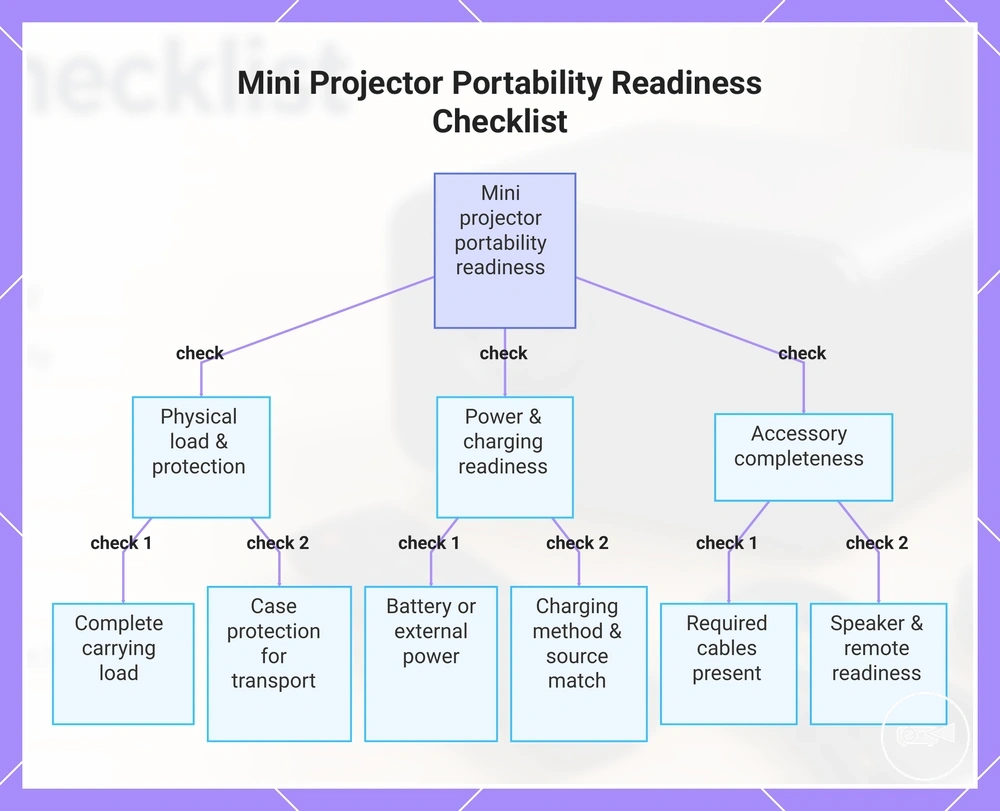
A mini projector is ready for portable use only when its size and weight are practical to carry, its power supply matches the planned location, and the required accessories are available. Small dimensions alone do not confirm readiness because battery status, charging access, cables, protection, and audio needs can determine whether the setup is usable. Judge portability against the complete use case rather than the projector body alone.
Judge portability against the complete use case rather than the projector body alone.
For room-to-room use, check whether the mini projector can be moved with its power adapter, remote control, cables, and any required speaker without creating setup gaps. For travel or outdoor sessions, a built-in battery provides independent power only for its stated operating period, while a mains-powered model requires a compatible outlet or portable power source. The charging method must match the available connection and required input, and a case should protect the projector and loose accessories during transport.
Select the mini projector only when its total carrying load, power access, and accessory readiness match the intended session.
Select the mini projector only when its total carrying load, power access, and accessory readiness match the intended session. A lighter model with missing cables or no suitable audio output can be less practical than a heavier model with a complete and compatible setup.
- Size and weight: Check the mini projector together with the items that must travel with it. Choose it when the complete carrying load suits room-to-room movement, travel, or outdoor use.
- Battery: Confirm whether the mini projector has a built-in battery or requires continuous external power. For battery use, compare the stated operating time with the planned session length.
- Charging and power supply: Verify the required charging method, input rating, and power source. The setup is not ready when the available charger, outlet, or power bank cannot provide the required input.
- Cables: Identify the power and source-device cables required for the planned setup. Missing or incompatible cables prevent use even when the mini projector is easy to carry.
- Case protection: Use a case that fits the mini projector and keeps the lens, remote control, and cables protected during transport. Without suitable protection, impact and accessory-loss risks increase.
- Speaker need: Decide whether the built-in speaker suits the intended room or whether an external speaker and compatible audio output are required. Include the speaker and its power needs in the portability decision.
- Remote control: Confirm whether essential controls remain available on the mini projector if the remote is unavailable. Treat the remote and its battery as part of accessory readiness when normal operation relies on them.
This chart shows the key checks to determine whether a mini projector is ready for portable use, covering physical load, power, and accessory completeness.
Size, Weight, Battery Life, and Charging Options
A mini projector is genuinely portable only when its size and total carried weight suit the usage pattern, its battery life covers the planned session, and its charging options match the available power source. Check the complete carrying load and power path rather than the projector body alone.
- Size and carried weight: Check the projector dimensions and combine its stated weight with the power adapter and required cables. The setup is practical only when the complete load suits the intended carrying pattern.
- Battery status: Identify whether the mini projector is rechargeable or requires continuous mains power. Choose battery-dependent use only when the model has a built-in battery and its stated runtime covers the planned session.
- Battery life: Compare the stated runtime with the intended viewing period and the stated test conditions. Higher brightness mode, speaker use, or reduced battery condition can shorten runtime below the published maximum.
- Recharge time: Check the model’s stated time for a full recharge and compare it with the time available between sessions. A recharge period longer than the available break limits repeated portable use even when one charge covers a single session.
- Power adapter: Confirm the required adapter type, connector, input voltage, and power rating. Mains-powered portability is suitable only when a compatible outlet and the correct power adapter are available.
- Power bank: Treat power-bank compatibility as confirmed only when the mini projector accepts portable power through the specified charging port and the power bank provides the required voltage and wattage. A matching connector alone does not confirm sufficient power delivery.
- Decision: Select mains power for locations with reliable outlet access and battery use for sessions that require independent power. The reviewed evidence does not provide one class-wide runtime, recharge time, weight, or charging specification, so verify these values for the individual mini projector.
Carrying Case, Cables, Speakers, and Remote Needs
A mini projector has immediate usability only when the accessories required by its source device, room, and placement are available. Check each setup item against a specific use case, because accessories complete the practical setup but do not replace core specification checks.
- Carrying case: Choose a fitted carrying case when the mini projector will be transported or stored with its cables and adapters. It is optional when the projector remains protected in one fixed location.
- Cables and adapters: Confirm that the source device and mini projector share a supported connection, such as HDMI, or add the required adapter. An HDMI cable or adapter is essential only when the planned wired source cannot connect without it.
- Speakers: Add external speakers when the projector's built-in audio is unsuitable for the room or the content requires clearer sound. Speakers are optional when the built-in audio meets the intended listening need.
- Remote and tripod: A remote is useful when the mini projector will be operated from the viewing position, while a tripod is useful when no stable placement surface is available. Both are convenience items when onboard controls and the existing surface meet the setup conditions.
- Screen: Use a screen when no flat, suitable projection surface is available or when a dedicated surface is needed for consistent placement. A suitable wall makes the screen optional for first use.
Purchase Mistakes and Specification Claims to Verify
Purchase mistakes often happen when specification claims are compared without checking the conditions behind them. Verify each mini projector claim against the intended room, source device, and accessory requirements before comparing offers. This reduces the risk of choosing a model that does not match the planned setup.
This reduces the risk of choosing a model that does not match the planned setup.
Specification claims should be treated as verification points rather than final buying decisions. A brightness claim should be checked with its stated testing conditions, while native resolution should be confirmed in the specification table rather than inferred from supported input formats. Wireless expectations should match the documented connection features, and missing accessories such as HDMI cables or adapters should be identified before purchase. Weak audio and unrealistic image-size promises should be checked against the product manual or buyer documentation before making a decision.
- Brightness claim: Check how brightness is measured and whether the stated condition matches the intended room; reject the comparison when the measurement basis is missing.
- Native resolution: Verify the native resolution in the specification table; do not treat a supported input resolution as the projector's displayed resolution.
- Wireless expectations: Confirm that the documented wireless method supports the planned source device; choose another connection method when the required function is absent.
- Missing accessories: Check whether required HDMI cables, adapters, or other setup items are included; plan for them separately when their absence would prevent immediate use.
- Audio and image size: Review the documented speaker capability and recommended image-size conditions; avoid relying on headline claims that omit room or placement limits.
For example, a mini projector with suitable native resolution can still require an adapter for a specific laptop, while a large stated image size may be practical only under the documented viewing conditions. Use the specification table, product manual, and buyer documentation as the final decision sources before comparing offers.
The products below are useful examples for comparing available options.
The products below are useful examples for comparing available options. Before buying, check that the compatibility criteria, key features, and product details match your needs.
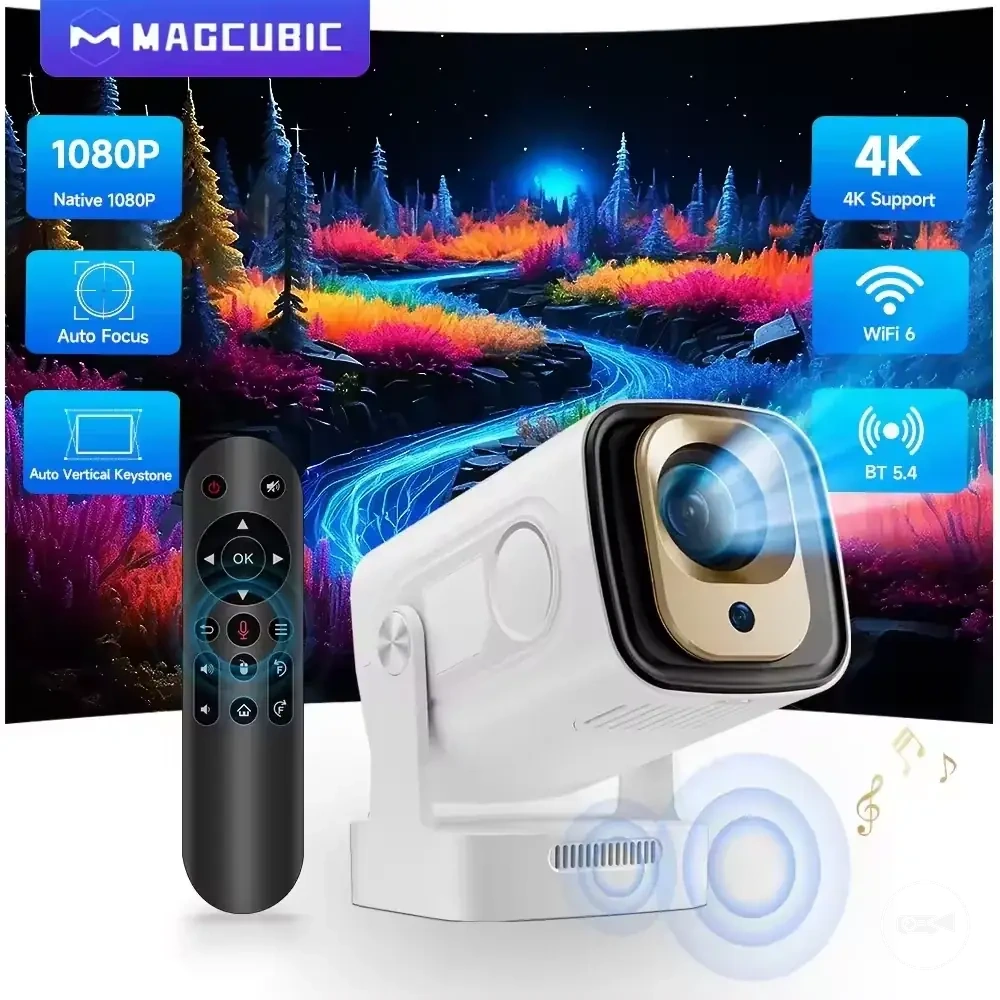
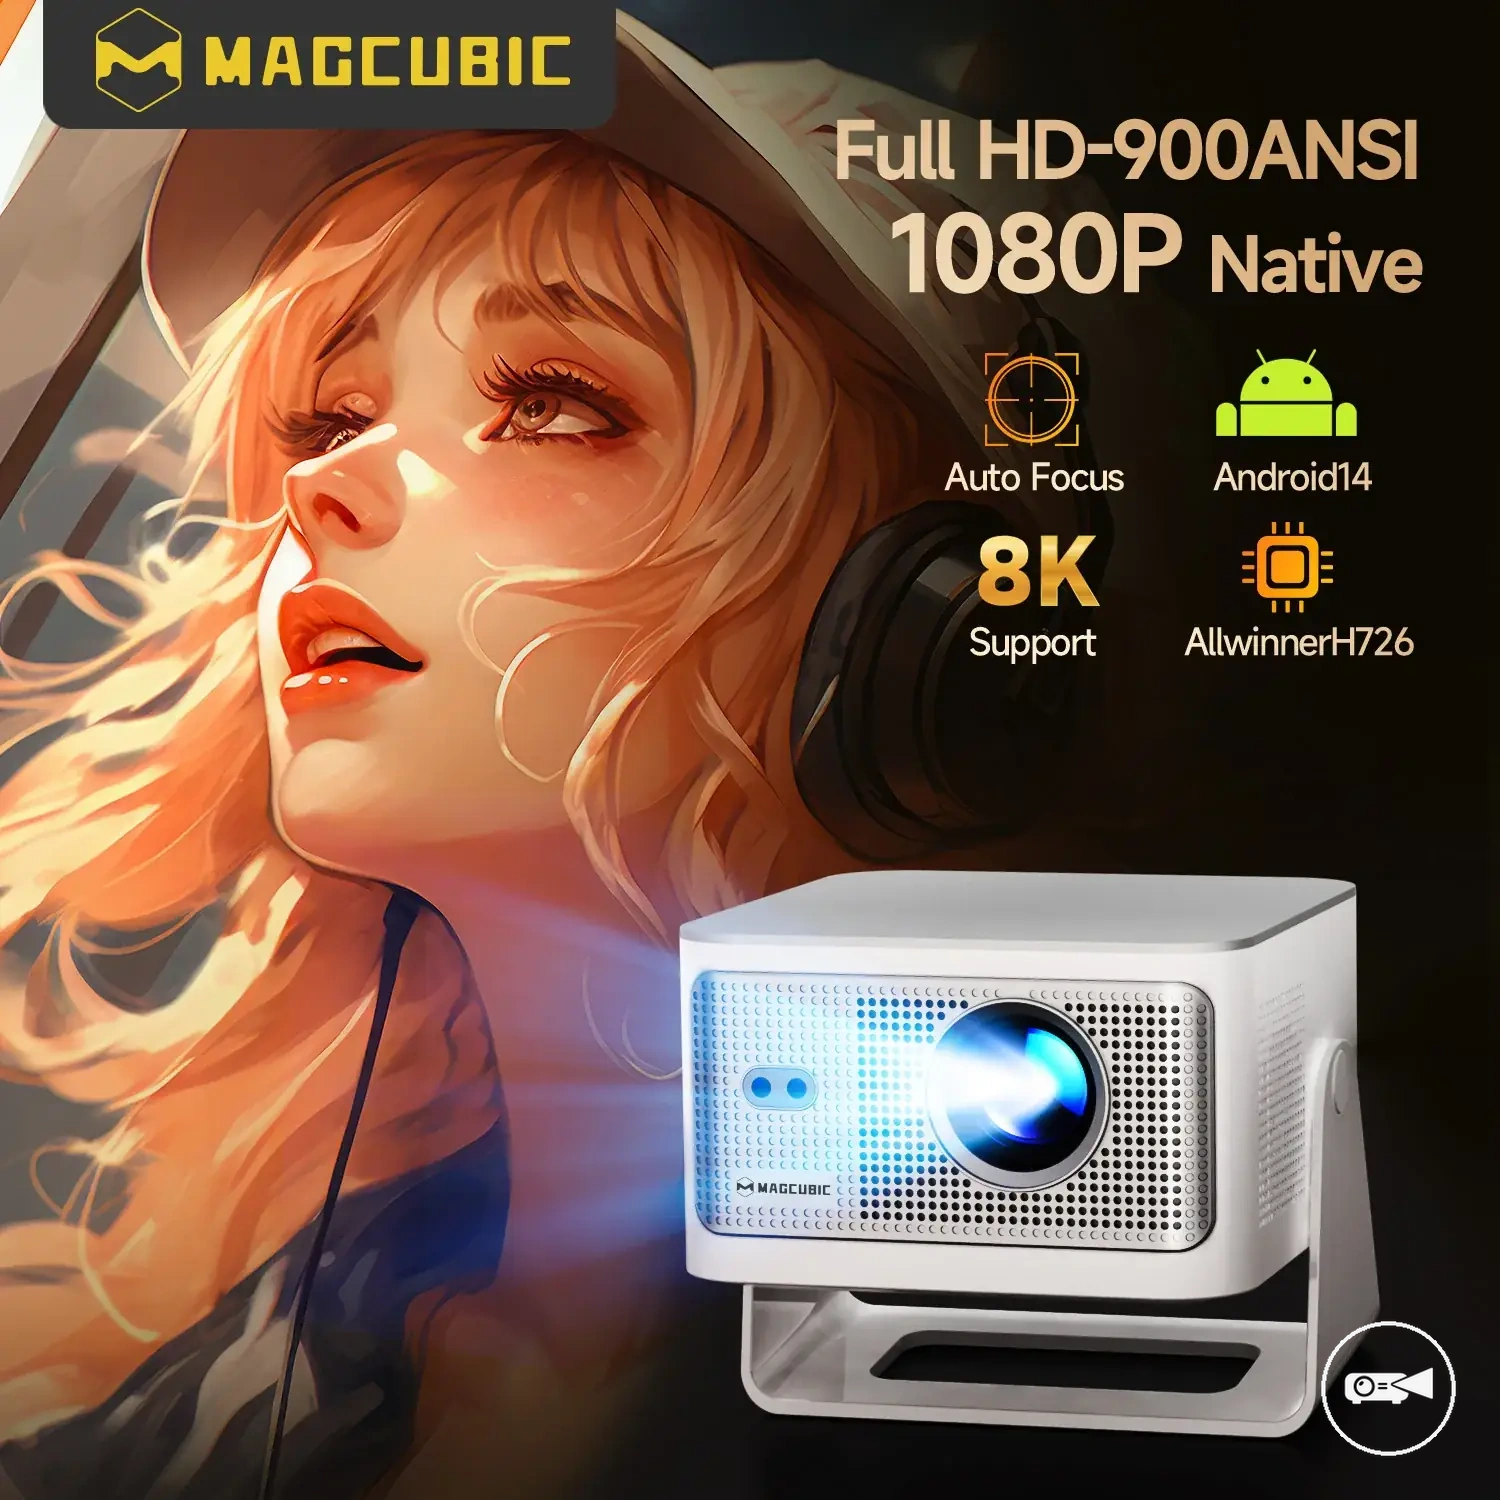
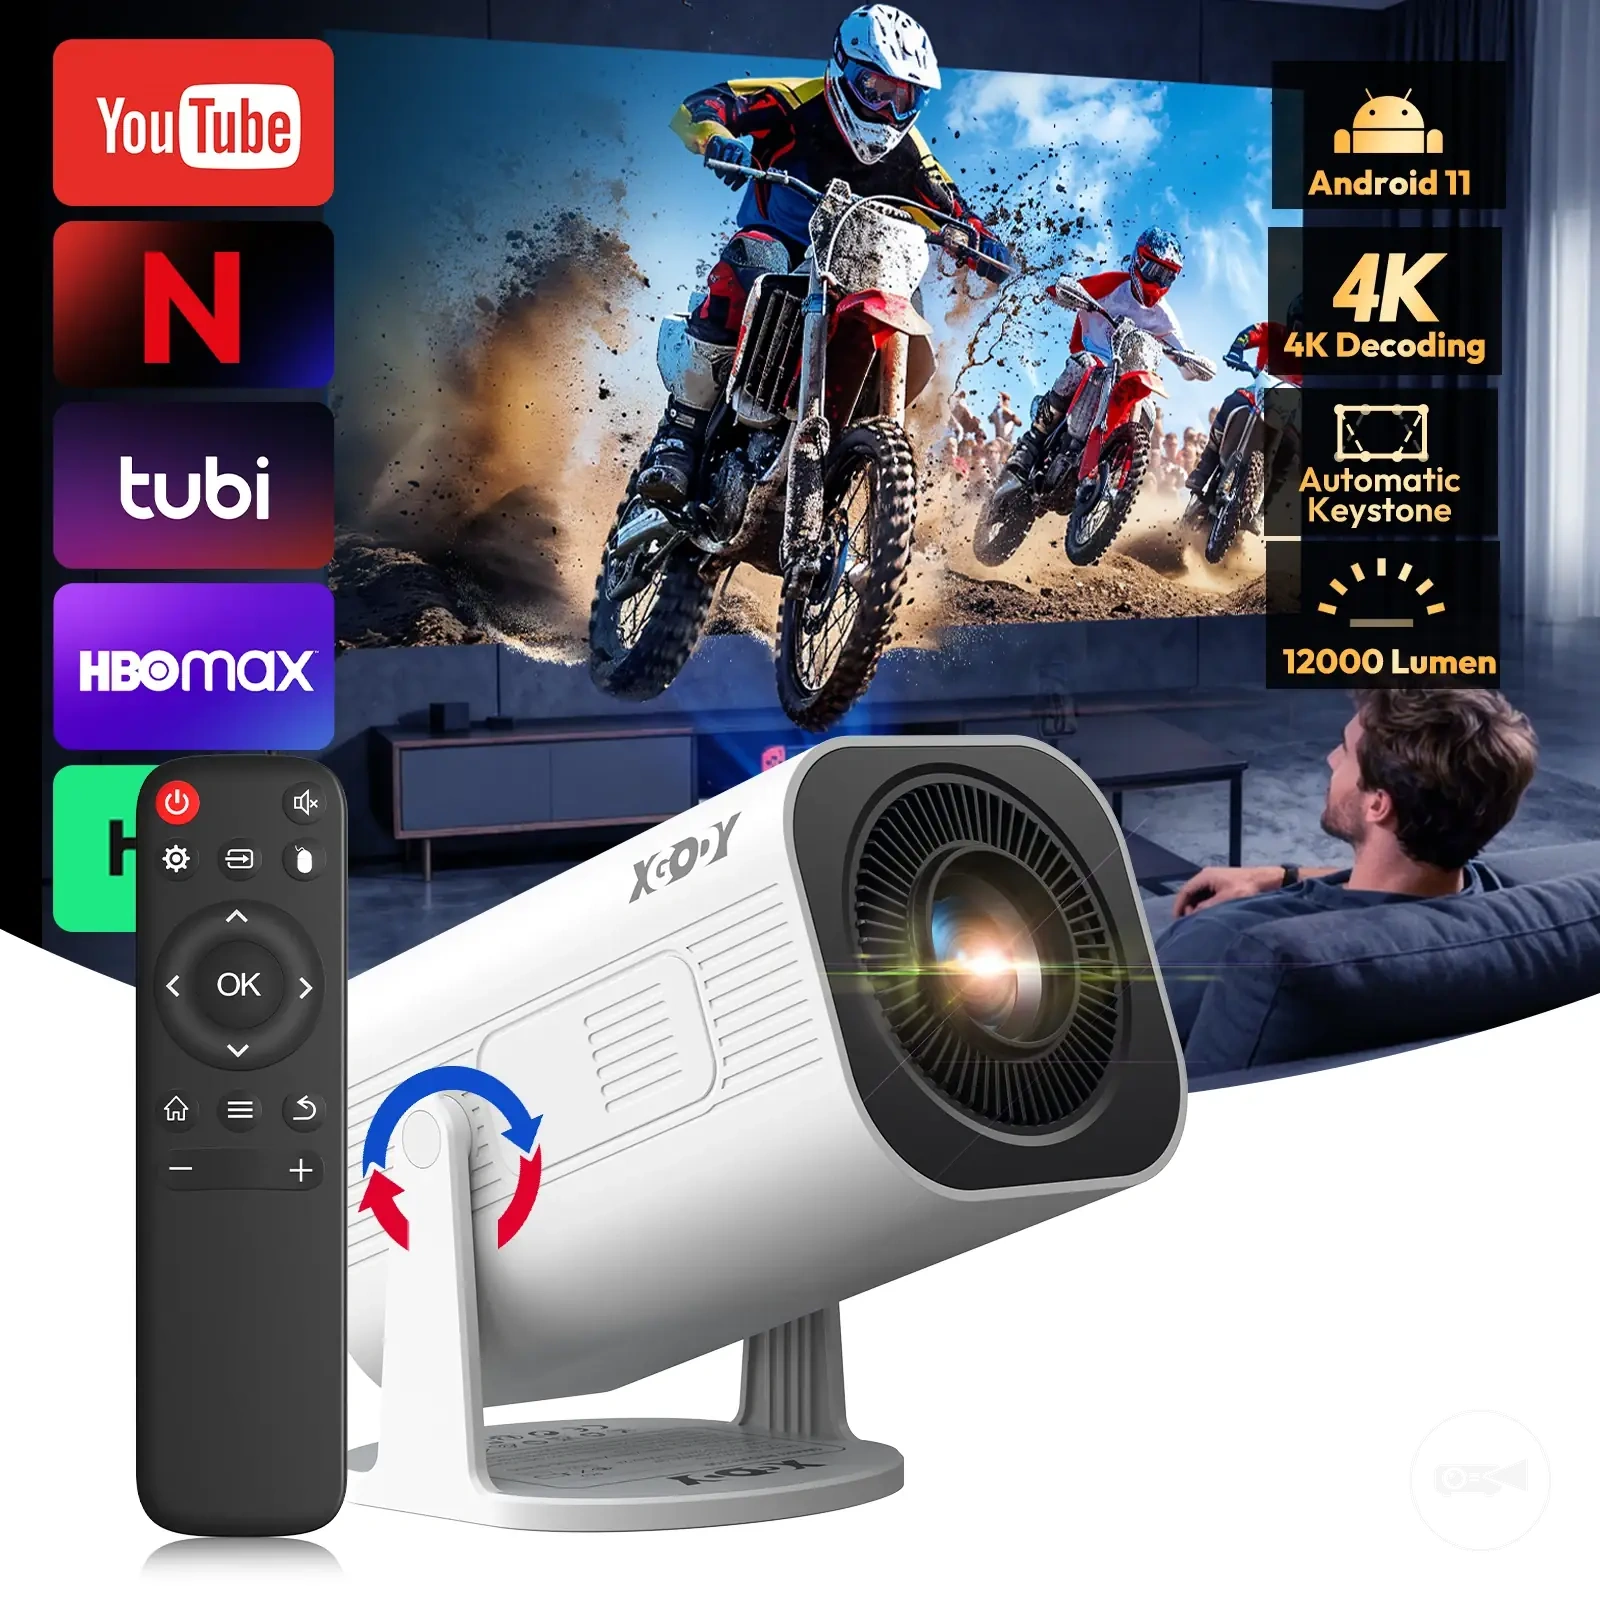
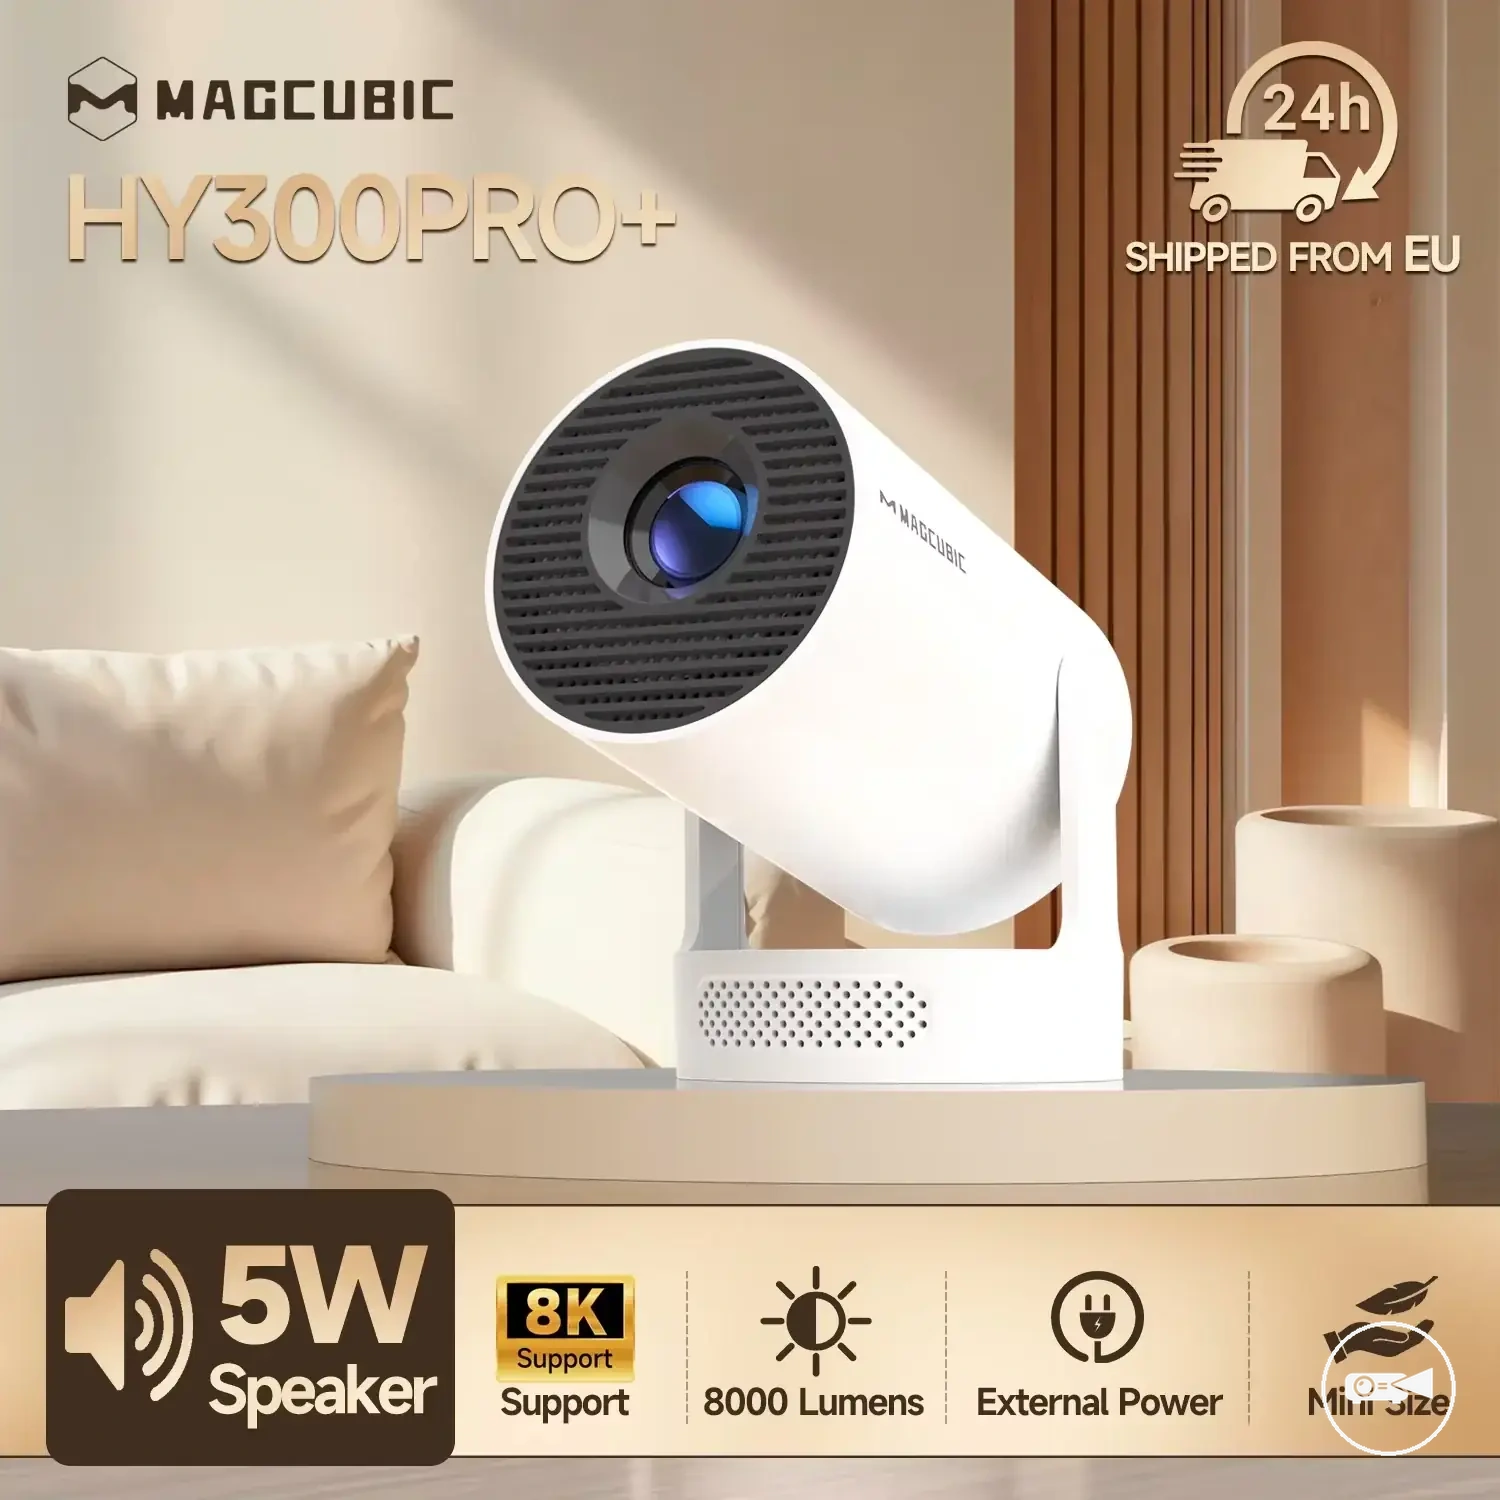
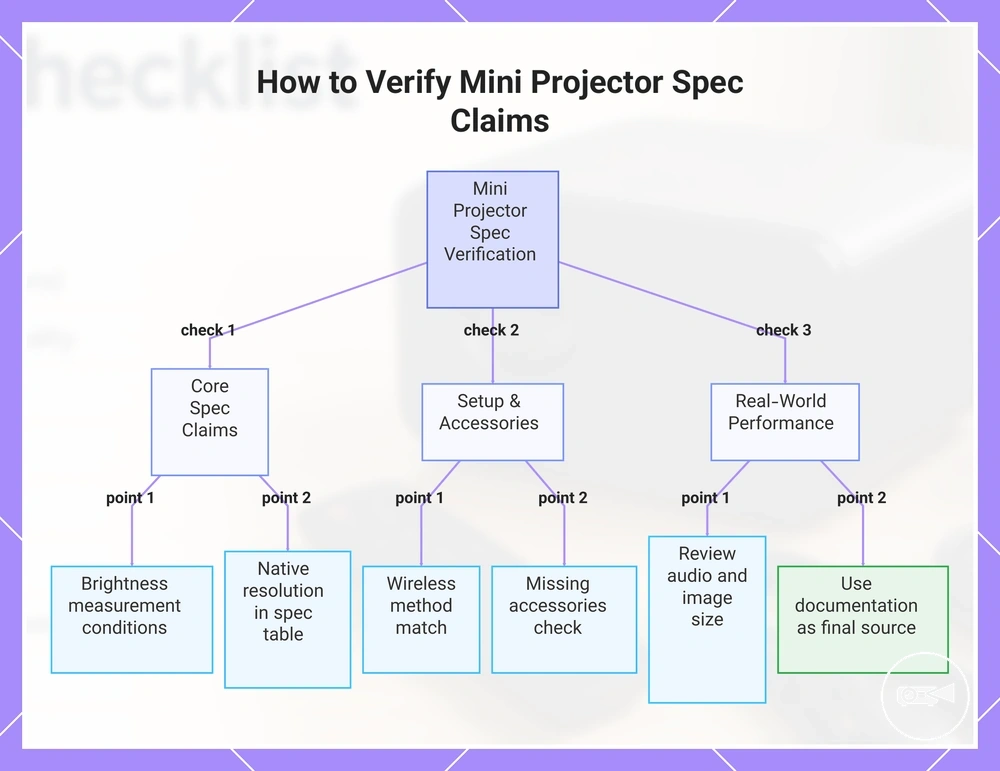
This chart shows the key verification points for mini projector specification claims, grouped by core specs, setup requirements, and real-world performance, with a final recommendation to use documentation as the decision source.
Misleading Brightness and Resolution Claims
A brightness claim or resolution claim is useful only when its measurement language and display meaning are clear. For a mini projector, compare like-for-like brightness measurements, confirm native resolution separately from supported resolution, and check viewing clarity under the planned room light, projection size, and surface quality.
| Claim wording | What to verify | Decision signal |
|---|---|---|
| Advertised brightness | Check whether the brightness claim uses a defined light-output measurement or an alternative label such as lux, LED lumens, or an unspecified lumen figure. | Compare headline numbers only when the measurement language and test basis match; otherwise treat the values as non-comparable. |
| Native resolution | Confirm the mini projector's native resolution in the specification table. | Use native resolution to identify the pixel grid the projector displays. |
| Supported resolution | Check which incoming signal resolutions the projector accepts. | Do not treat supported resolution as native resolution, because an accepted higher-resolution signal is scaled to the native pixel grid. |
| Viewing clarity | Assess the brightness and resolution claims against room light, projection size, focus, and surface quality. | Choose the claim only when its stated conditions match the planned viewing setup. |
For example, a mini projector described as supporting a higher-resolution input should not be classified at that resolution unless its native resolution states the same value. The final local check is whether the documented measurement and display values support the intended room, image size, and projection surface.
Hidden Setup Limits and Missing Accessories
Hidden setup limits can prevent a mini projector from being usable in the planned location when placement, power, connectivity, or audio requirements are incomplete. Before purchase, verify that the required cable length, adapter, support, power access, and controls are already available or included in the setup plan.
- Cable length: Confirm that the video and power cables reach from the source device and outlet to the intended projector position; a shorter cable creates a placement limit and requires a longer compatible cable.
- Adapter: Match the source device connector to the projector input; include an adapter when the connector types differ, or the source device cannot connect directly.
- Tripod: Check whether existing furniture holds the projector at the required height and angle; use a tripod or stand only when stable placement is otherwise unavailable.
- Screen: Confirm that the available wall is flat, light-coloured, and free from strong texture; plan for a screen when the surface would reduce viewing clarity.
- Power access: Verify that a suitable outlet is within the planned cable reach; change the position or power arrangement when the lead would be stretched across a walkway.
- Speaker output: Check whether the built-in speaker output suits the intended room and whether the projector provides a compatible audio output when external speakers are required.
- Remote control: Confirm that a remote control is included or that the projector remains practical to operate from its onboard controls; its absence is a usability limit when the unit will be mounted or placed out of reach.
For example, a mini projector may suit the required image size and portability but still need an adapter for the source device or a tripod to reach the correct projection angle. The final check is whether all missing accessories and setup conditions are resolved before the projector is selected.
Final Value Check Before Leaving to Compare Offers
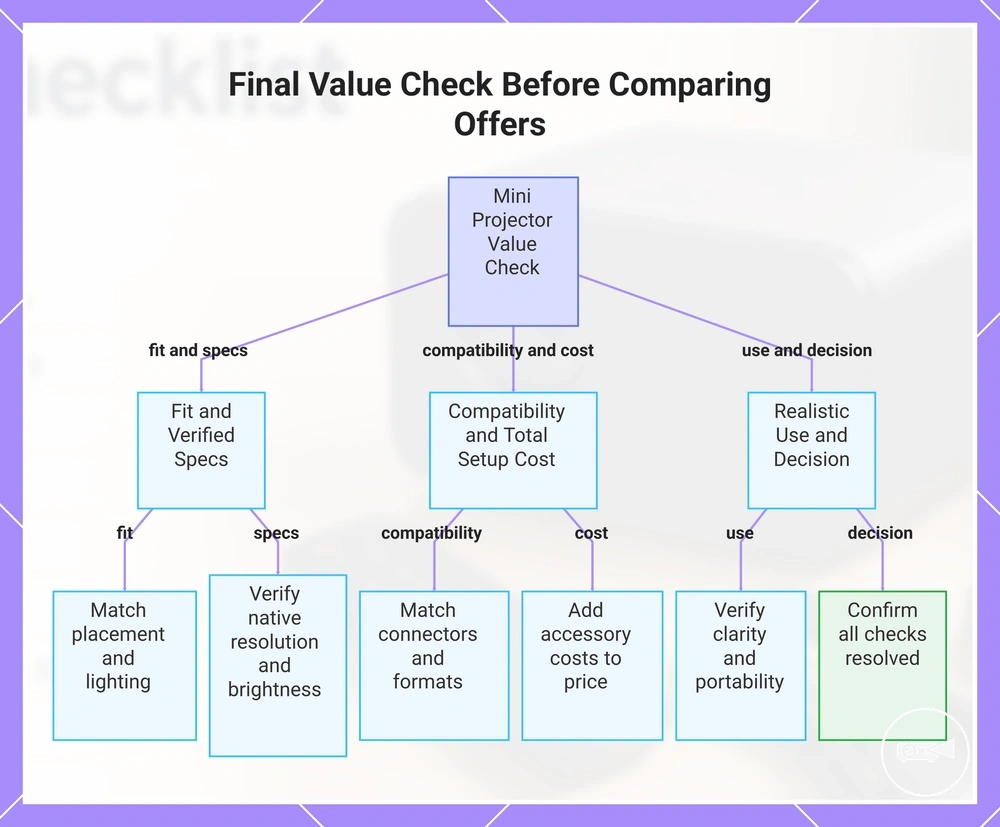
A final value check should confirm that the mini projector fits the intended room, use case, and source devices before you compare offers. Value is stronger when the required performance is supported by verified specifications and the expected setup does not add unresolved costs or limits.
Compare the resulting value and limitations against the intended viewing conditions rather than the headline price alone.
Start with the projector price, then add the total setup cost of any required adapter, cable, tripod, screen, external speaker, or power accessory. Compare the resulting value and limitations against the intended viewing conditions rather than the headline price alone. A lower-priced option loses value when its specifications remain unclear, its compatibility is incomplete, or essential accessories raise the final cost. Use these checks to confirm fit, specifications, compatibility, accessories, and realistic use:
- Fit: Confirm that the projector's throw distance, image size, placement method, and room-light needs match the intended space; unresolved placement limits reduce purchase readiness.
- Verified specifications: Check that native resolution, brightness measurement language, supported inputs, power method, and audio capability are stated clearly; missing or ambiguous values are a reason to pause.
- Compatibility: Match the source device's connector and output format to the projector's supported input; include any required adapter in the decision.
- Total setup cost: Add all required accessories and setup items to the projector price; use the combined amount for the offer comparison.
- Realistic use: Confirm that viewing clarity, speaker output, portability, and control access suit the planned room and audience rather than an ideal test setting.
- Decision: A mini projector is ready to compare when its fit, verified specifications, compatibility, total setup cost, and intended use are resolved; keep verifying any option with missing values or unconfirmed requirements.
For example, an option with a lower listed price may deliver weaker value when it also requires an adapter, stand, and external speaker, while a higher-priced option may have a lower total setup cost because those needs are already resolved. Compare offers only after purchase readiness is confirmed, so the final decision reflects usable value rather than the projector price alone.
Before buying, check that the compatibility criteria, key features, and product details match your needs.
The products below are useful examples for comparing available options. Before buying, check that the compatibility criteria, key features, and product details match your needs.
This chart shows the five key checks and the final decision to confirm a mini projector's purchase readiness before comparing offers.