
Mini Projector for Outdoor Use
A mini projector can work for outdoor use when backyard viewing takes place after dusk or in another controlled low-light setting. Image visibility is strongest when ambient light is limited, the screen size is moderate, and the setup remains stable. Daylight viewing or permanent outdoor cinema performance should not be expected.
Start the projection after direct sunlight has faded.
For backyard viewing, place the mini projector on a stable surface and aim it at a flat screen or light-coloured wall. Start the projection after direct sunlight has faded. Use an outlet for continuous power, or select a battery model with enough stated runtime for the planned viewing period. Keep the source device within the supported connection range or use a wired input where available.
Throw distance and placement also affect focus and stability.
Brightness and ambient light determine how clearly the projected image remains visible, while screen size affects how widely that brightness is spread. A larger image reduces visible contrast when the projector output and lighting conditions remain unchanged. Throw distance and placement also affect focus and stability. For example, a moderate image on a shaded patio wall after dusk is more usable than a larger image exposed to nearby garden lighting.
A larger image reduces visible contrast when the projector output and lighting conditions remain unchanged.
Check these practical criteria before selecting a mini projector for outdoor use:
- Ambient light: Use the projector where direct sunlight is absent and nearby lighting can be reduced.
- Brightness: Compare models using the same stated brightness measurement and treat each value as model-specific.
- Screen size: Choose a moderate image size when visibility is more important than maximum scale.
- Power: Use a reliable outlet for continuous operation or a battery runtime that covers the intended session.
- Placement: Keep the projector stable and within the throw distance required for the selected screen size.
- Connection: Confirm that the projector supports the wired or wireless output used by the phone, laptop, streaming device, or media player.
A suitable outdoor mini projector is one whose brightness, power, connection, placement, and screen requirements match the planned environment. Controlled lighting and a stable setup improve visibility, while excessive ambient light, an oversized image, or insufficient runtime may limit the result.
Table of Contents
When a Mini Projector Can Work Outside
A mini projector can work outside when outdoor viewing takes place in low light with controlled ambient light and a clear projection surface. The setting also requires a stable surface, suitable power access, adequate audio, and protection from weather exposure.
The image below clarifies these baseline viewing conditions.
These conditions define when a mini projector can work outside without turning backyard use into a permanent installation. For example, a low-light yard with the projector placed securely, a screen or wall facing the seating area, and access to power represents a realistic controlled setting. The image below clarifies these baseline viewing conditions.
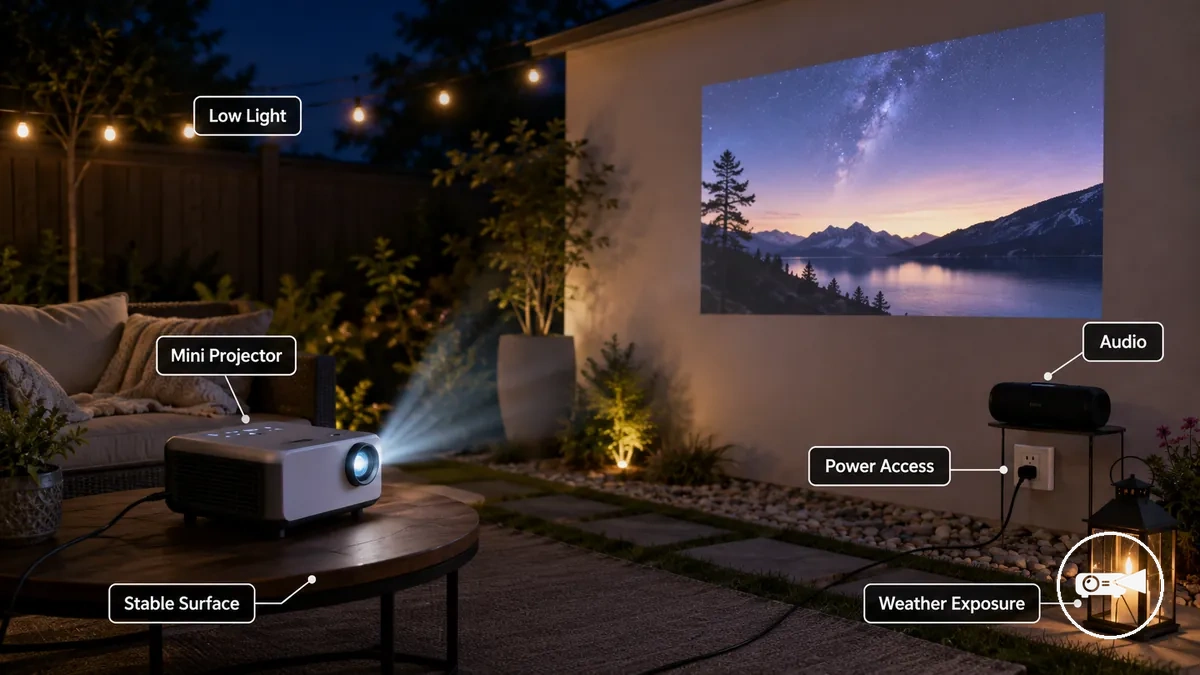
- Low light: Direct sunlight is absent, so controlled ambient light allows the projected image to remain visible.
- Stable surface: The projector and screen remain fixed enough to preserve alignment and image stability.
- Power access: A nearby outlet supports continuous use, while battery operation is limited to the runtime stated for the model.
- Audio: Built-in speakers suit only the area and listening level their model-specific output can cover; larger seating areas require a compatible external speaker.
- Weather exposure: The projector remains protected from rain, moisture, and dust unless the manufacturer specifies that those conditions are supported.
The broader mini projector guide places these conditions within the wider choice of projector type and intended use. Realistic portable projection requires a controlled outdoor setting and differs from projection in full daylight or from a fixed outdoor system designed for permanent use.
Outdoor Brightness and Image Visibility
Outdoor brightness and image visibility are acceptable when a mini projector's ANSI lumens are viewed in low ambient light on a suitably sized screen. After dusk, reduced surrounding light improves contrast; under stronger light, the same projector can produce a weak or washed-out image.
A lighter, more reflective projection surface returns more light toward the viewing area than a dark or uneven wall.
ANSI lumens describe measured light output, but the visible result is also shaped by ambient light, screen size, and surface gain. Porch lights and streetlights reduce perceived contrast, while a larger image spreads the available light across more surface area and appears dimmer. A lighter, more reflective projection surface returns more light toward the viewing area than a dark or uneven wall. For example, a moderate image shown after dusk on a light-coloured screen will usually remain clearer than a larger image shown beside an uncovered porch light.
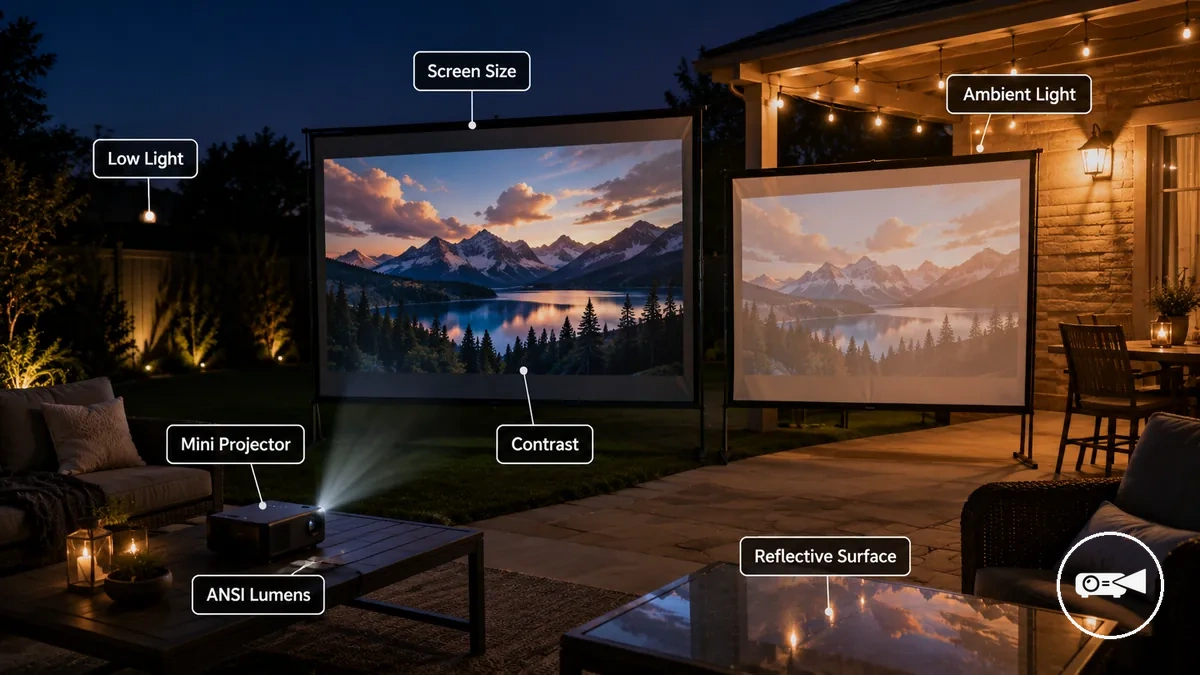
The table organises common outdoor conditions by their brightness concern, screen-size effect, and practical viewing decision.
| Outdoor condition | Brightness concern | Screen-size effect | Practical decision |
|---|---|---|---|
| Low light after dusk | Limited ambient light preserves more perceived contrast. | A moderate screen size concentrates the available light. | Acceptable for controlled backyard viewing when the picture remains clear at the chosen size. |
| Mixed light from porch lights or streetlights | Surrounding light competes with the projected image and reduces contrast. | A larger image increases brightness spread and can look weaker. | Risky; reduce nearby light, use a smaller image, or move to a more reflective surface. |
| Bright daylight | High ambient light can overwhelm the output of most mini projectors. | Increasing image size further lowers perceived brightness. | Unsuitable for most mini projector viewing unless the environment is heavily shaded and the model is specified for that condition. |
Acceptable backyard viewing is signalled by readable detail, stable colour, and sufficient contrast at the intended screen size; fading dark areas and a washed-out image indicate that ambient light or image size has exceeded the practical viewing limit. Use the criteria in brightness and lumens for outdoor use to interpret a model's stated output alongside the actual light level, projection surface, and image size.
Ambient Light, Dusk Viewing, and Lumen Expectations
Ambient light determines practical lumen expectations because increasing surrounding light reduces visible contrast and demands more projector brightness for the same image. Dusk viewing generally requires less brightness than locations affected by porch lights or streetlights, while full darkness provides the clearest viewing conditions.
The image below highlights how surrounding light changes perceived visibility and contrast.
Ambient light, dusk viewing, and lumen expectations become easier to compare when the same projected image is viewed under different lighting conditions. The image below highlights how surrounding light changes perceived visibility and contrast.
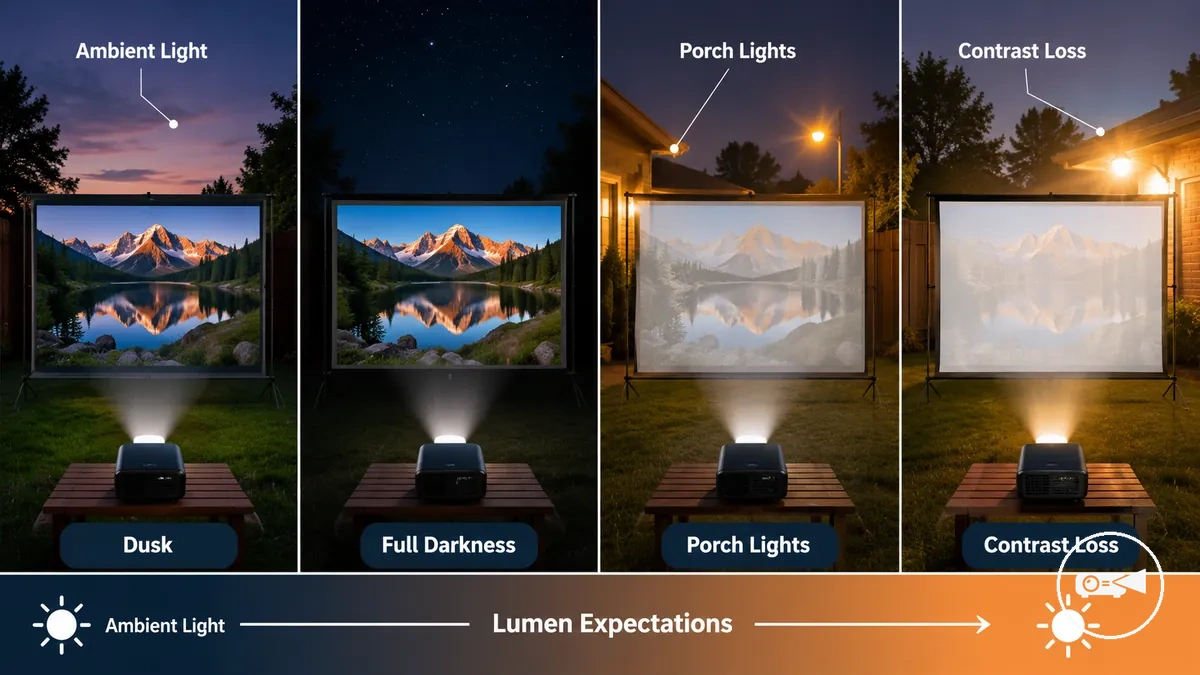
- Dusk: Remaining natural light creates moderate brightness demand, so the image stays viewable but shows lower contrast than in full darkness.
- Full darkness: Minimal ambient light preserves the strongest visible contrast, allowing darker image details to remain easier to distinguish.
- Light-polluted yard: Porch lights and streetlights increase contrast loss, making shadow detail less visible and raising practical brightness demand.
- Mixed outdoor lighting: For example, a projector beside an uncovered porch light will usually appear more washed out than the same setup moved to a darker part of the yard.
Lumen expectations should therefore be interpreted as conditional guidance because the practical brightness needed changes with ambient light, projector specifications, screen size, and the intended viewing environment rather than following an exact universal lumen requirement.
Screen Size Limits for a Visible Backyard Image
Screen size directly affects outdoor image visibility because the projector's available brightness is spread across a larger projection area. A larger image can improve viewing comfort from a greater viewing distance, but it also reduces perceived brightness and makes image fit more dependent on backyard layout.
Screen size is easier to evaluate by comparing the setup variables that influence image visibility.
Screen size is easier to evaluate by comparing the setup variables that influence image visibility. The table below shows how each factor changes the practical result without increasing the projector's light output.
| Setup factor | Effect on outdoor image visibility |
|---|---|
| Screen diagonal | A larger screen spreads brightness over a wider area, reducing perceived image brightness. |
| Throw distance | Longer placement distance is typically required for a larger image, making image fit and focus more sensitive. |
| Viewing distance | A greater viewing distance generally suits a larger image, while sitting too close can reduce perceived sharpness. |
| Surface reflectivity | A smoother, more reflective projection surface preserves visible brightness better than a darker or highly textured surface. |
For example, a portable projector that produces a comfortable image on a moderate screen in a compact backyard setup can appear noticeably dimmer when the image is enlarged without changing placement or reducing ambient light. Matching screen size with throw distance, focus, viewing distance, and backyard layout helps maintain a more visible image for outdoor viewing.
Outdoor Screen, Throw Distance, and Placement Fit
A mini projector works best outdoors when the projector, screen, and backyard layout physically align. The available placement space must support the required throw distance for the chosen screen size while maintaining clear image fit, accurate focus, and a comfortable viewing distance.
Placement fit becomes easier to evaluate by comparing the main layout criteria before setting up.
Placement fit becomes easier to evaluate by comparing the main layout criteria before setting up. The table below shows how screen size, throw distance, and available space work together to determine whether an outdoor viewing arrangement is practical.
| Layout factor | Practical effect on setup |
|---|---|
| Throw distance | The projector must be placed within its supported projection distance to create the intended screen size while maintaining focus. |
| Screen size | A larger screen requires more placement distance and spreads the same projector brightness across a wider image area. |
| Image fit | The projected image should remain fully contained on the projection surface without cropping or overshooting the edges. |
| Viewing distance | Seating should allow viewers to see the complete image comfortably without sitting unnecessarily close to the screen. |
| Backyard layout | A stable, unobstructed placement area helps keep projector alignment consistent throughout outdoor viewing. |
A wall, portable screen, or dedicated outdoor screen can all provide a suitable projection surface, provided the available space allows the required throw distance and stable projector placement. For example, a narrow backyard may require reducing the screen size so the projector can remain within its usable placement range while keeping the image fully focused.
For a more detailed explanation of how projector optics determine screen size and placement , refer to the dedicated guide.
For a more detailed explanation of how projector optics determine screen size and placement, refer to the dedicated guide. Confirming these layout relationships before setup helps the mini projector, projection surface, and backyard layout work together for more effective outdoor viewing.
Backyard Screen Size and Seating Distance
Backyard screen size and seating distance should match so viewers can see the entire image comfortably while the projector maintains suitable image fit and focus. A practical outdoor setup balances screen size with throw distance, placement, and the available backyard layout instead of relying on a single screen size for every mini projector.
The table below compares the main criteria that influence seating comfort without assuming one arrangement fits every outdoor environment.
Viewing distance helps organise practical screen choices because larger screens are generally more comfortable when seating is positioned farther away, while moderate screen sizes often suit compact backyard layouts. The table below compares the main criteria that influence seating comfort without assuming one arrangement fits every outdoor environment.
| Criterion | Practical consideration |
|---|---|
| Viewing distance | Increase seating distance as screen size increases so the complete image remains comfortable to view. |
| Screen size | Choose a screen size that matches the available throw distance and physical placement space. |
| Viewer group size | Larger groups generally benefit from a larger image when seating extends across a wider viewing area. |
| Image fit and focus | Correct projector placement helps keep the projected image fully on the screen while maintaining consistent focus. |
| Brightness loss | Enlarging the projected image spreads the available light over a greater surface, reducing perceived brightness. |
For example, a compact backyard with seating close to the screen may provide a more comfortable viewing experience using a moderate screen size rather than extending the image beyond the available placement distance. Matching screen size, viewing distance, throw distance, placement, and backyard layout helps a mini projector deliver more comfortable outdoor viewing without unnecessarily reducing image quality.
Tripod, Table Height, and Projection Angle Stability
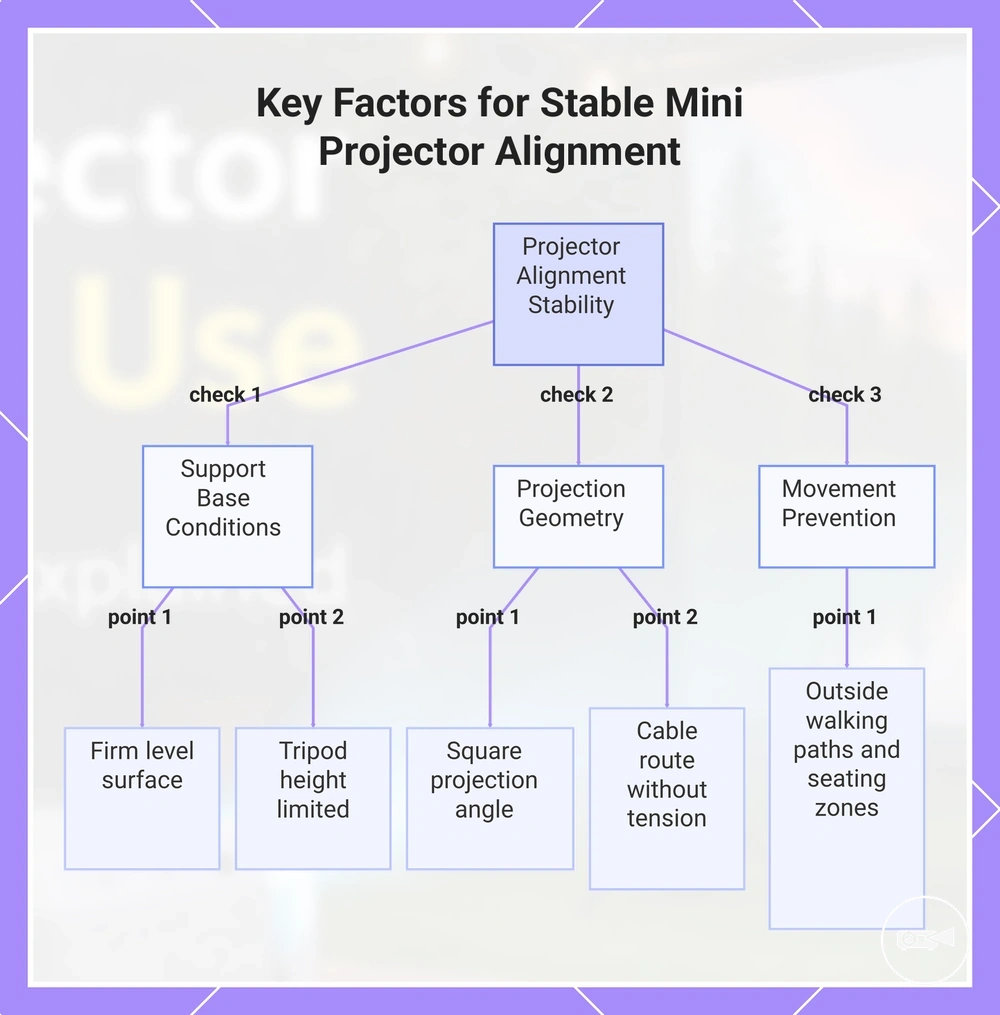
A stable setup keeps a mini projector aligned during outdoor viewing by limiting movement that shifts image fit or focus. Whether the placement uses a table or tripod, the support should remain level and secure on a stable surface so the projection angle does not change after alignment.
The checklist below organises the factors that affect image alignment and setup readiness.
Placement stability can be checked through a short set of local conditions before viewing begins. The checklist below organises the factors that affect image alignment and setup readiness.
- Support surface: Use a firm, level surface; a soft, sloped, or uneven base increases the risk of tilt and image movement.
- Tripod height: Set the tripod only as high as required for screen alignment, because greater extension can make the support more sensitive to contact or vibration.
- Projection angle: Keep the projector as square to the screen as the backyard setup allows; a steeper off-axis angle requires more keystone correction and can distort image geometry.
- Cable route: Route power and signal cables without tension so cable strain does not pull the projector or alter its placement.
- Accidental movement: Keep the support outside walking paths and seating movement zones so bumps are less likely to shift focus or framing.
For example, a portable projector on an uneven table can tilt when the cable is moved, causing the projection angle and image position to shift together. Stable support, restrained cable strain, and a controlled projection angle improve readiness and help maintain consistent alignment during outdoor mini projector use.
For example, a portable projector on an uneven table can tilt when the cable is moved, causing the projection angle and image position to shift together.
This chart shows the main factors that affect mini projector alignment stability during outdoor use, including support conditions, projection geometry, and movement prevention.
Power Options for Portable Outdoor Projection
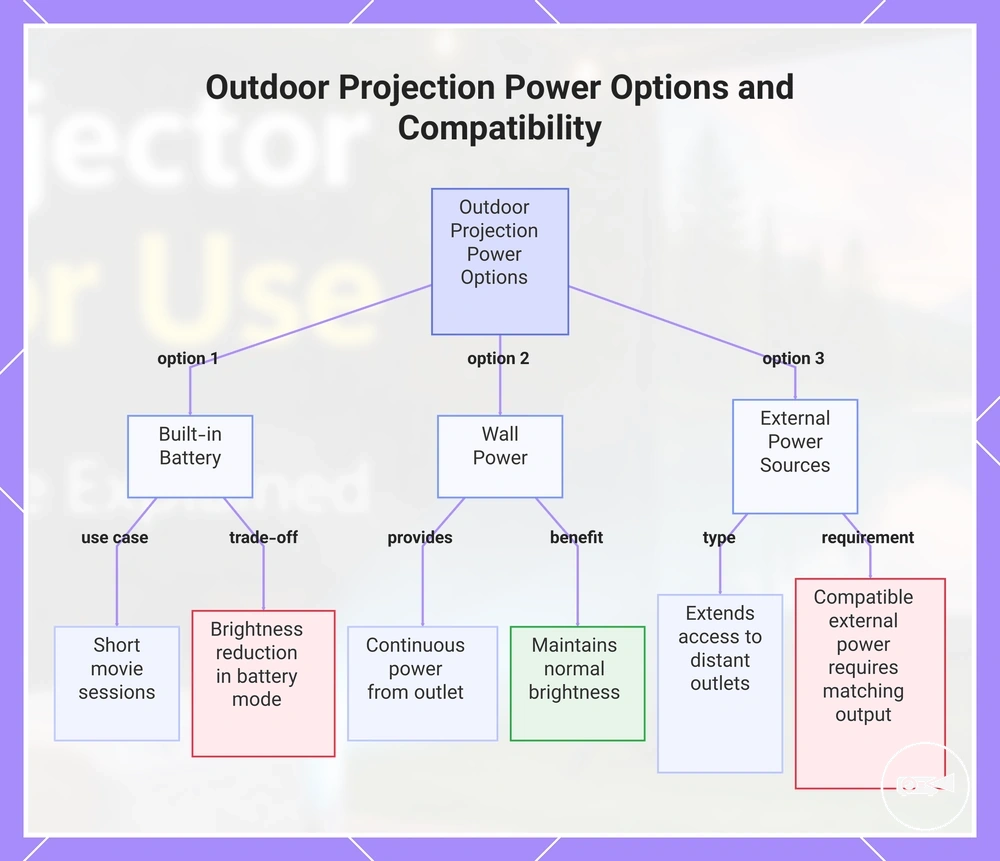
Power compatibility is determined by matching the projector's input requirement with an appropriate power source for the intended viewing session. Built-in batteries, wall power, extension power, and compatible external power sources each provide a different balance between runtime, brightness stability, and portability.
Choosing the right power source is easier when the main compatibility criteria are compared before outdoor viewing.
Choosing the right power source is easier when the main compatibility criteria are compared before outdoor viewing. The checklist below organises how each option affects runtime, output, and practical use while avoiding assumptions that every mini projector supports the same connection or power input.
- Built-in battery: Supports short movie sessions when the available runtime matches the planned viewing period, although the device may reduce brightness in battery mode to extend operation.
- Wall power: Supplies continuous power through a compatible connection when a nearby outlet is available, helping the device maintain its normal brightness mode during longer viewing sessions.
- Extension power: Extends access to mains power when the outlet is farther from the backyard setup, provided the extension connection safely supports the projector's power requirement.
- Compatible external power: Supports outdoor use only when the external power source provides an output and input connection compatible with the projector's specified requirement. Insufficient output can reduce operating mode or cause the device to shut down during use.
For example, a portable projector with a built-in battery can suit a short outdoor movie where no outlet is available, while a longer session is better matched to wall power or a compatible external power source that satisfies the device's input requirement. For a more detailed explanation of runtime, energy demand, and viewing duration, see battery life and power use. Matching the power source to the viewing environment helps maintain stable outdoor mini projector performance.
Matching the power source to the viewing environment helps maintain stable outdoor mini projector performance.
This chart compares the main power options for portable outdoor projection, showing their use cases, conditions, and trade-offs.
Built-in Battery Runtime for Outdoor Movies
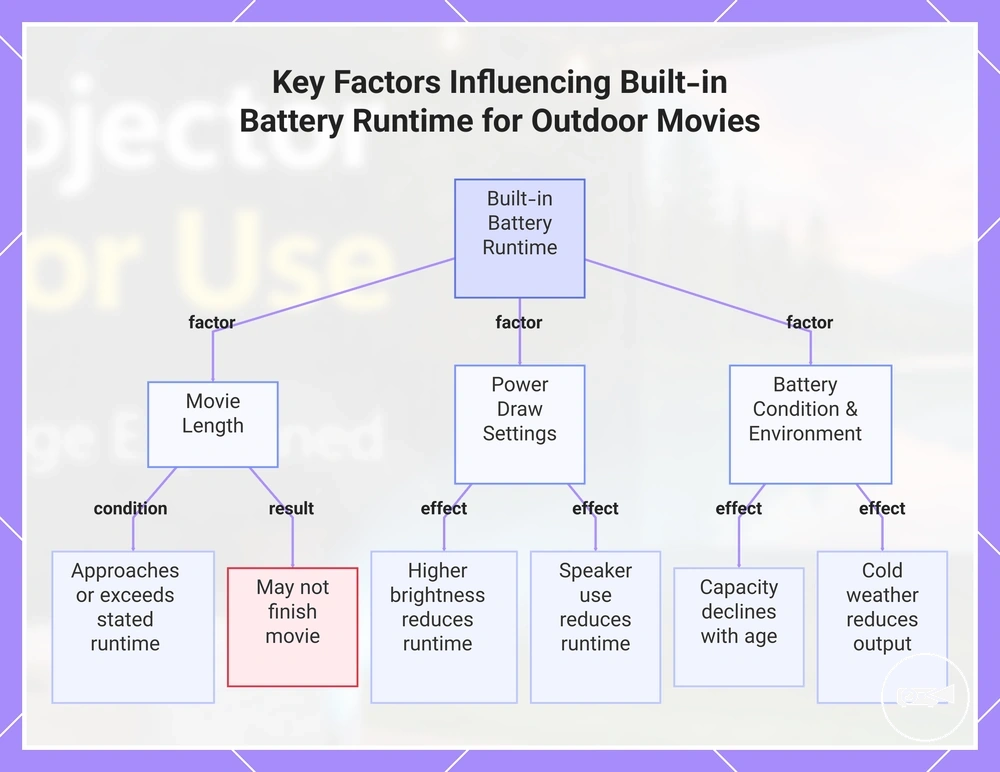
Built-in battery runtime supports outdoor movies when the available battery capacity is sufficient for the planned session length. For backyard viewing in low light, the advertised runtime is a reference value rather than the expected duration of every movie because brightness, audio use, temperature, and battery condition all influence actual operating time.
The points below organise the local factors that influence portability and practical viewing.
Built-in battery runtime is easier to judge by checking the main conditions that affect an outdoor movie session. The points below organise the local factors that influence portability and practical viewing.
- Movie length: A session that approaches or exceeds the stated runtime increases the risk that the battery will not last until the movie finishes.
- Brightness mode: Higher brightness settings draw more battery power, while lower brightness settings used in low-light conditions generally support a longer runtime.
- Speaker use: Built-in speakers consume battery power during playback, reducing the available session length compared with video playback alone.
- Battery age: As battery capacity declines over time, the available runtime can become shorter than the original runtime claim under the same viewing conditions.
- Temperature: Cold outdoor conditions can temporarily reduce available battery output, limiting runtime during an outdoor viewing session.
For example, a portable projector used for casual use in a shaded backyard setup may complete a full movie when the brightness is reduced for low-light viewing and speaker volume remains moderate, while the same projector can finish earlier during a brighter, colder session with heavier audio use. Matching the expected session length to realistic battery conditions helps improve portability and reduce interruptions during outdoor mini projector use.
This chart shows the main factors that affect how long a built-in battery lasts during an outdoor movie session, helping you estimate actual runtime.
This chart shows the main factors that affect how long a built-in battery lasts during an outdoor movie session, helping you estimate actual runtime.
External Power and Power Bank Compatibility
External power or power bank compatibility requires the projector's input connection to match the supply connector and the supply output to meet the device's stated voltage, wattage, and charging requirement. A matching source can support longer runtime for outdoor viewing, while an incompatible connection or insufficient output can prevent charging, limit operation, or stop the mini projector from running.
Use this mini-checklist to verify whether an external supply suits the portable projector rather than assuming any USB power bank will work.
Use this mini-checklist to verify whether an external supply suits the portable projector rather than assuming any USB power bank will work.
- Input port: The projector input must accept the same connector type as the power source or a manufacturer-supported adapter.
- Voltage: The supply output must match the voltage specified for the projector input; a different voltage category is not a valid match.
- Wattage: The source must provide at least the projector's stated operating or charging wattage, otherwise charging can slow, operation can be limited, or the device can fail to start.
- Charging protocol: Where the projector requires a particular charging protocol, the power bank and cable must support that same protocol to deliver the required output.
- Cable quality: The cable must be rated for the required power level and maintain a stable connection; an under-rated or damaged cable can restrict output.
- Run while charging: Continuous runtime is possible only when the projector supports operation while connected to external power; devices that charge only when switched off cannot use the power bank as a live supply.
For example, a backyard setup will support extended outdoor use only when the power bank, cable, connector, voltage, wattage, charging protocol, and run-while-charging behaviour all match the projector's requirements. Checking these conditions before outdoor viewing reduces the risk of an interrupted session and improves the practical fit of external power.
Connection and Sound Needs for Backyard Viewing
Connection and sound compatibility for backyard viewing is achieved when the projector accepts the intended video source and provides an audio output that suits the outdoor environment. Outdoor viewing increases the importance of connection stability, speaker coverage, and device compatibility because longer viewing distances and ambient noise can reduce the overall experience.
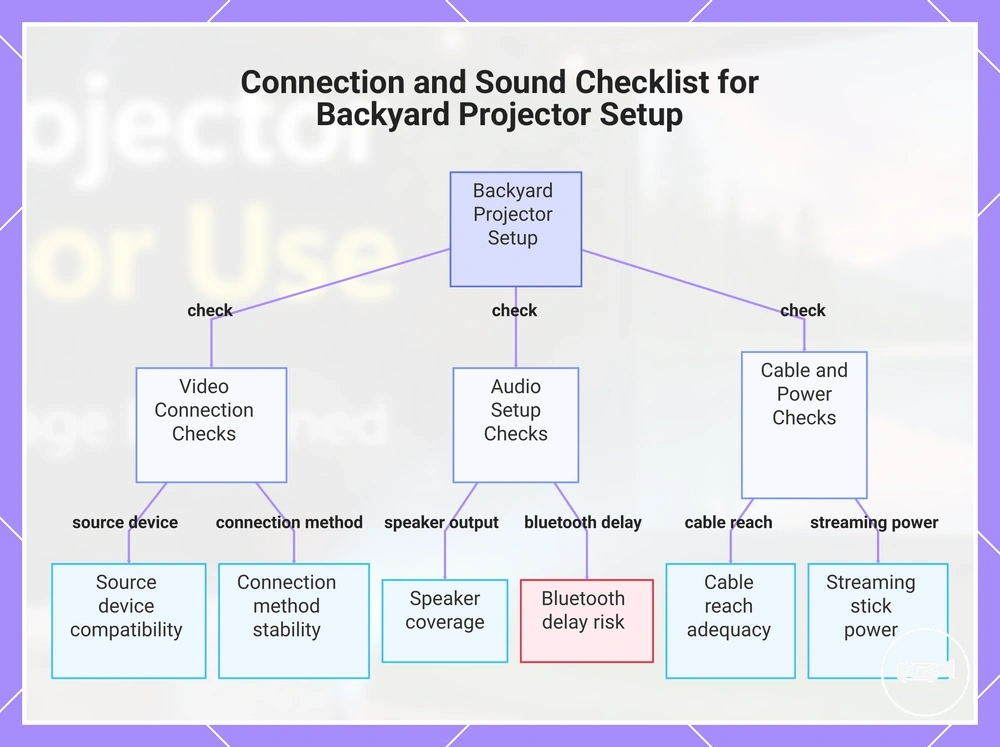
The checklist below helps verify whether a portable projector is ready for outdoor viewing without turning setup into a complete connectivity process.
The checklist below helps verify whether a portable projector is ready for outdoor viewing without turning setup into a complete connectivity process.
- Source device: Confirm that the projector supports the intended device, such as a streaming stick, phone, or laptop, through a compatible video input or supported wireless connection.
- Connection method: A wired connection provides a stable signal path, while a wireless connection requires both devices to support the same connection standard and maintain a reliable connection throughout playback.
- Streaming hardware: A streaming stick requires both a compatible video input and sufficient power from the projector or an external power source before it can operate correctly.
- Wi-Fi reliability: Wireless streaming is suitable only when the available Wi-Fi connection remains stable enough to support continuous video playback without frequent interruptions.
- Speaker output: Built-in speakers are generally suitable for listeners positioned close to the projector, while a larger backyard setup often requires an external speaker for wider sound coverage.
- Bluetooth delay: Bluetooth audio can introduce audible lip-sync delay on some projector and speaker combinations, so a wired audio connection is a better choice when accurate audio timing is a requirement.
- Cable reach: HDMI, audio, and power cables should be long enough to position equipment safely while avoiding excessive tension or trip hazards.
For example, a backyard setup using a laptop connected by HDMI and a wired external speaker reduces the chance of wireless interruptions and Bluetooth audio delay during a movie. Verifying connection, input, output, power, and sound requirements before outdoor use helps the mini projector deliver a more reliable viewing experience.
This chart shows the key connection and sound checks to verify before using a portable projector outdoors.
This chart shows the key connection and sound checks to verify before using a portable projector outdoors.
HDMI, Wi-Fi, and Streaming Device Compatibility
HDMI, Wi-Fi, and streaming device compatibility is achieved when the projector supports the selected content input and the required connection method for outdoor viewing. Reliable compatibility requires the correct input, sufficient power for connected devices, and a stable connection that matches the source device.
The checklist below highlights the connection checks that help maintain reliable content playback during a backyard setup.
The checklist below highlights the connection checks that help maintain reliable content playback during a backyard setup.
- HDMI input: Verify that the projector provides a compatible HDMI input for the source device. If a phone or tablet lacks native HDMI output, use a compatible video adapter that supports the required output format.
- Wireless casting: Wireless casting supports outdoor viewing only when both the projector and the source device use the same casting technology and the Wi-Fi connection remains stable.
- Streaming device power: A streaming stick requires both a compatible HDMI input and adequate power from the projector's USB output or an external power supply before streaming can begin.
- App support: Streaming applications remain available only when they are supported by the connected streaming device or the projector's supported casting platform.
- Wi-Fi strength: Strong Wi-Fi signal quality is a requirement for continuous online streaming because weak signal strength may interrupt playback during outdoor viewing.
- Adapter requirements: Use a compatible adapter only when the projector input and the source device output use different video connectors, and confirm that the adapter supports video transmission rather than charging only.
For example, a laptop connected through HDMI typically provides a direct video connection, while a streaming stick also requires sufficient power and dependable Wi-Fi to maintain playback. Completing these compatibility checks before outdoor use helps a mini projector deliver more reliable content playback with fewer connection interruptions.
Built-in Speakers and Outdoor Audio Support
In a quiet backyard setup with listeners seated close to the projector, a built-in speaker may be enough for casual outdoor viewing. Open-air sound disperses more freely than indoor sound, so greater seating distance or higher ambient noise can make dialogue harder to hear.
In a quiet backyard setup with listeners seated close to the projector, a built-in speaker may be enough for casual outdoor viewing.
The comparison below organises the main conditions that determine whether built-in audio support is sufficient or an external speaker is the better practical fit.
- Built-in speaker: Suits close seating in quieter conditions but struggles when the audience moves farther away or surrounding sound becomes more noticeable.
- Speaker wattage: A higher wattage rating can support greater sound output, but enclosure design, speaker direction, and the outdoor environment also affect the result.
- Bluetooth: Bluetooth supports wireless external audio, although processing delay between the projector and speaker can create lip-sync mismatch.
- Audio-out: A wired audio-out connection provides a direct signal path and is the more suitable option when reducing lip-sync risk is a requirement.
- External speaker placement: Placing the speaker near the seating area shortens the sound path to the audience and can improve clarity without moving the projector.
For example, viewers seated close to a mini projector in a quiet garden may find the built-in speaker adequate, while a larger group positioned farther away in an environment with traffic or conversation noise is more likely to need an external speaker. Matching the sound output, connection type, and speaker placement to the seating distance improves the practical result for outdoor mini projector use.
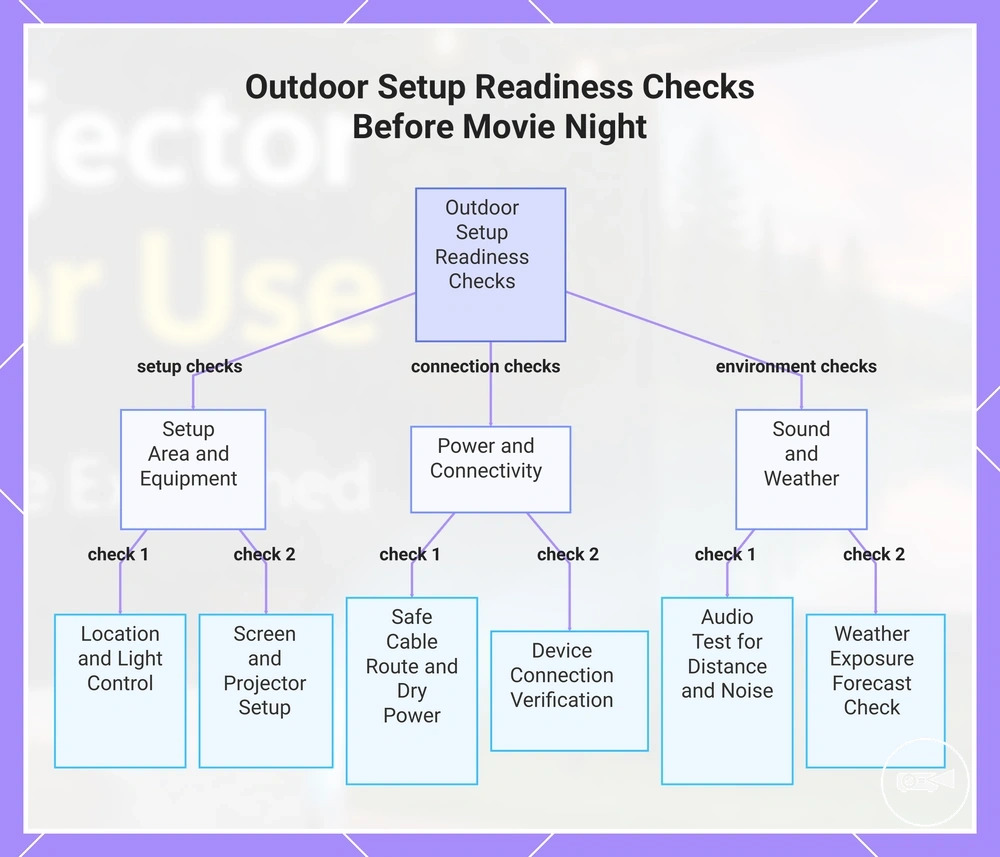
Outdoor Setup Requirements Before Movie Night
A quick readiness check before movie night helps prevent common outdoor setup problems related to visibility, power, connections, and equipment placement. Confirming the viewing area before switching on the mini projector reduces the need for adjustments once playback begins.
Confirming the viewing area before switching on the mini projector reduces the need for adjustments once playback begins.
Use the checklist below to verify that the outdoor setup is ready without turning preparation into a full installation process.
- Location: Select a viewing area with enough room for the projector, screen, and audience while limiting nearby light sources.
- Screen support: Confirm that the screen or projection surface is firmly supported and unlikely to move during outdoor viewing.
- Projector placement: Place the projector on a stable surface or tripod, then verify that the projection angle aligns correctly with the screen.
- Power route: Check that the cable route reaches the power source without creating a trip hazard, and keep power connections away from damp ground where practical.
- Device connection: Verify that the playback device connects successfully before the audience arrives to avoid interruptions.
- Audio test: Test the sound in the outdoor environment because seating distance and background noise can affect listening comfort.
- Weather exposure: Check the forecast and avoid leaving equipment exposed when rain, excessive moisture, or strong wind is expected.
These readiness checks prepare the viewing area without replacing a complete setup tutorial. If you need detailed positioning and configuration guidance, see the mini projector setup guide. Completing these checks before playback improves readiness and helps reduce avoidable interruptions during outdoor mini projector use.
These readiness checks prepare the viewing area without replacing a complete setup tutorial.
This chart groups the essential pre-movie-night checks for outdoor setup into three categories: area and equipment, power and connectivity, and environment.
Surface Stability, Cable Safety, and Wind Exposure
Surface stability, cable safety, and wind exposure directly affect projection quality and equipment risk during outdoor use. A level setup with controlled cable placement helps keep the image steady while reducing avoidable interruptions during outdoor viewing.
Use the checks below to verify local conditions before starting the mini projector.
Use the checks below to verify local conditions before starting the mini projector.
- Surface stability: Place the projector on firm, level ground or another stable support so it is less likely to shift during playback.
- Uneven ground: Soft or sloping surfaces can alter the projection angle or allow equipment to move after positioning.
- Screen movement: Wind can move lightweight screens, reducing image clarity even when the projector remains stationary.
- Tripod tipping: A tripod is more stable on flat ground and can become easier to tip if placed on uneven terrain or accidentally bumped.
- Cable safety: Route power and signal cables away from walkways to reduce the risk of a trip hazard.
- Extension lead exposure: Keep extension leads and electrical connections away from standing water or damp ground to limit moisture exposure.
- Wind exposure: Strong wind can move lightweight equipment, while airborne dust can enter ventilation openings and increase equipment risk if the projector is operated in those conditions.
For example, a backyard setup on level paving with secured cables is less likely to be interrupted than one on uneven grass with loose extension leads during breezy weather. Checking these local conditions before playback improves practical readiness for outdoor mini projector use without assuming every projector is suitable for prolonged outdoor exposure.
What to Check Before Choosing an Outdoor Mini Projector
Choose an outdoor mini projector by matching its brightness, usable screen size, power plan, connection options, audio support, mounting stability, and portability to the intended viewing conditions. Occasional backyard use after dark can suit a compact, self-contained model, while more demanding outdoor movie setups require stronger image output, dependable power, flexible audio, and secure placement.
| Criterion | Outdoor condition | What to check | Decision effect |
|---|---|---|---|
| Brightness | Ambient light remains around the screen. | Compare brightness values stated under the same measurement standard and check the intended lighting condition. | Prioritise higher measured brightness as ambient light increases; rule out models that use an undefined brightness unit. |
| Screen size | The planned image must serve a wider audience. | Check the recommended image-size range and the available brightness at the intended projection distance. | Choose a smaller screen size when light output is limited; a larger image requires more brightness to remain usable. |
| Power | No convenient mains outlet is available. | Compare the stated battery runtime with the full programme length, or plan a protected mains connection with sufficient cable reach. | Choose battery operation only when the stated runtime covers the viewing period; longer sessions require a dependable external power plan. |
| Connection | The source is a streaming device, laptop, phone, or media player. | Verify the required input category, such as HDMI, USB-C, supported wireless casting, or an integrated streaming platform. | Choose a model that directly matches the intended source; rule out wireless-only operation when the source device or network cannot support it. |
| Audio | The audience is farther from the projector or outdoor noise is present. | Check for built-in speakers and an external audio route such as Bluetooth, a headphone output, or HDMI ARC. | Built-in audio can suit close-range backyard viewing; larger groups benefit from support for separate speakers. |
| Placement | The projector will sit on grass, paving, a table, or a tripod. | Check for a stable base, compatible mounting point, suitable throw distance, and adjustment controls for the planned projection angle. | Prioritise secure mounting on uneven or exposed surfaces; rule out placements that cannot hold the image position steadily. |
| Portability | The equipment must be carried, repositioned, and packed away after use. | Compare weight, dimensions, carrying support, battery inclusion, and the number of separate accessories required. | Higher portability supports occasional outdoor viewing, while a heavier setup can be practical when brightness, audio, and stability take priority. |
Brightness and screen size should be evaluated as one decision because enlarging the image spreads the available light across a wider area. A compact projector suited to dark evening use should not be assumed to provide the same practical fit for an earlier screening with more ambient light.
Brightness and screen size should be evaluated as one decision because enlarging the image spreads the available light across a wider area.
Match the battery or mains-power plan to the complete viewing period, then verify the connection method before comparing convenience features. Rule out a battery-powered model when its stated runtime does not cover the planned content or when its reduced-power mode limits brightness below the required viewing condition.
Match the battery or mains-power plan to the complete viewing period, then verify the connection method before comparing convenience features.
Audio and placement determine whether the outdoor mini projector can serve the intended audience without creating an unstable or complicated setup. For example, close-range backyard viewing may suit built-in audio on a stable table, while a larger gathering can justify external speaker support and a secure tripod or platform.
For occasional backyard use, prioritise simple connection, manageable screen size, integrated audio, battery convenience, and low carrying weight.
For occasional backyard use, prioritise simple connection, manageable screen size, integrated audio, battery convenience, and low carrying weight. For demanding outdoor movie setups, prioritise stronger measured brightness, a dependable power route, external audio support, stable mounting, and realistic limits on ambient light and weather exposure.
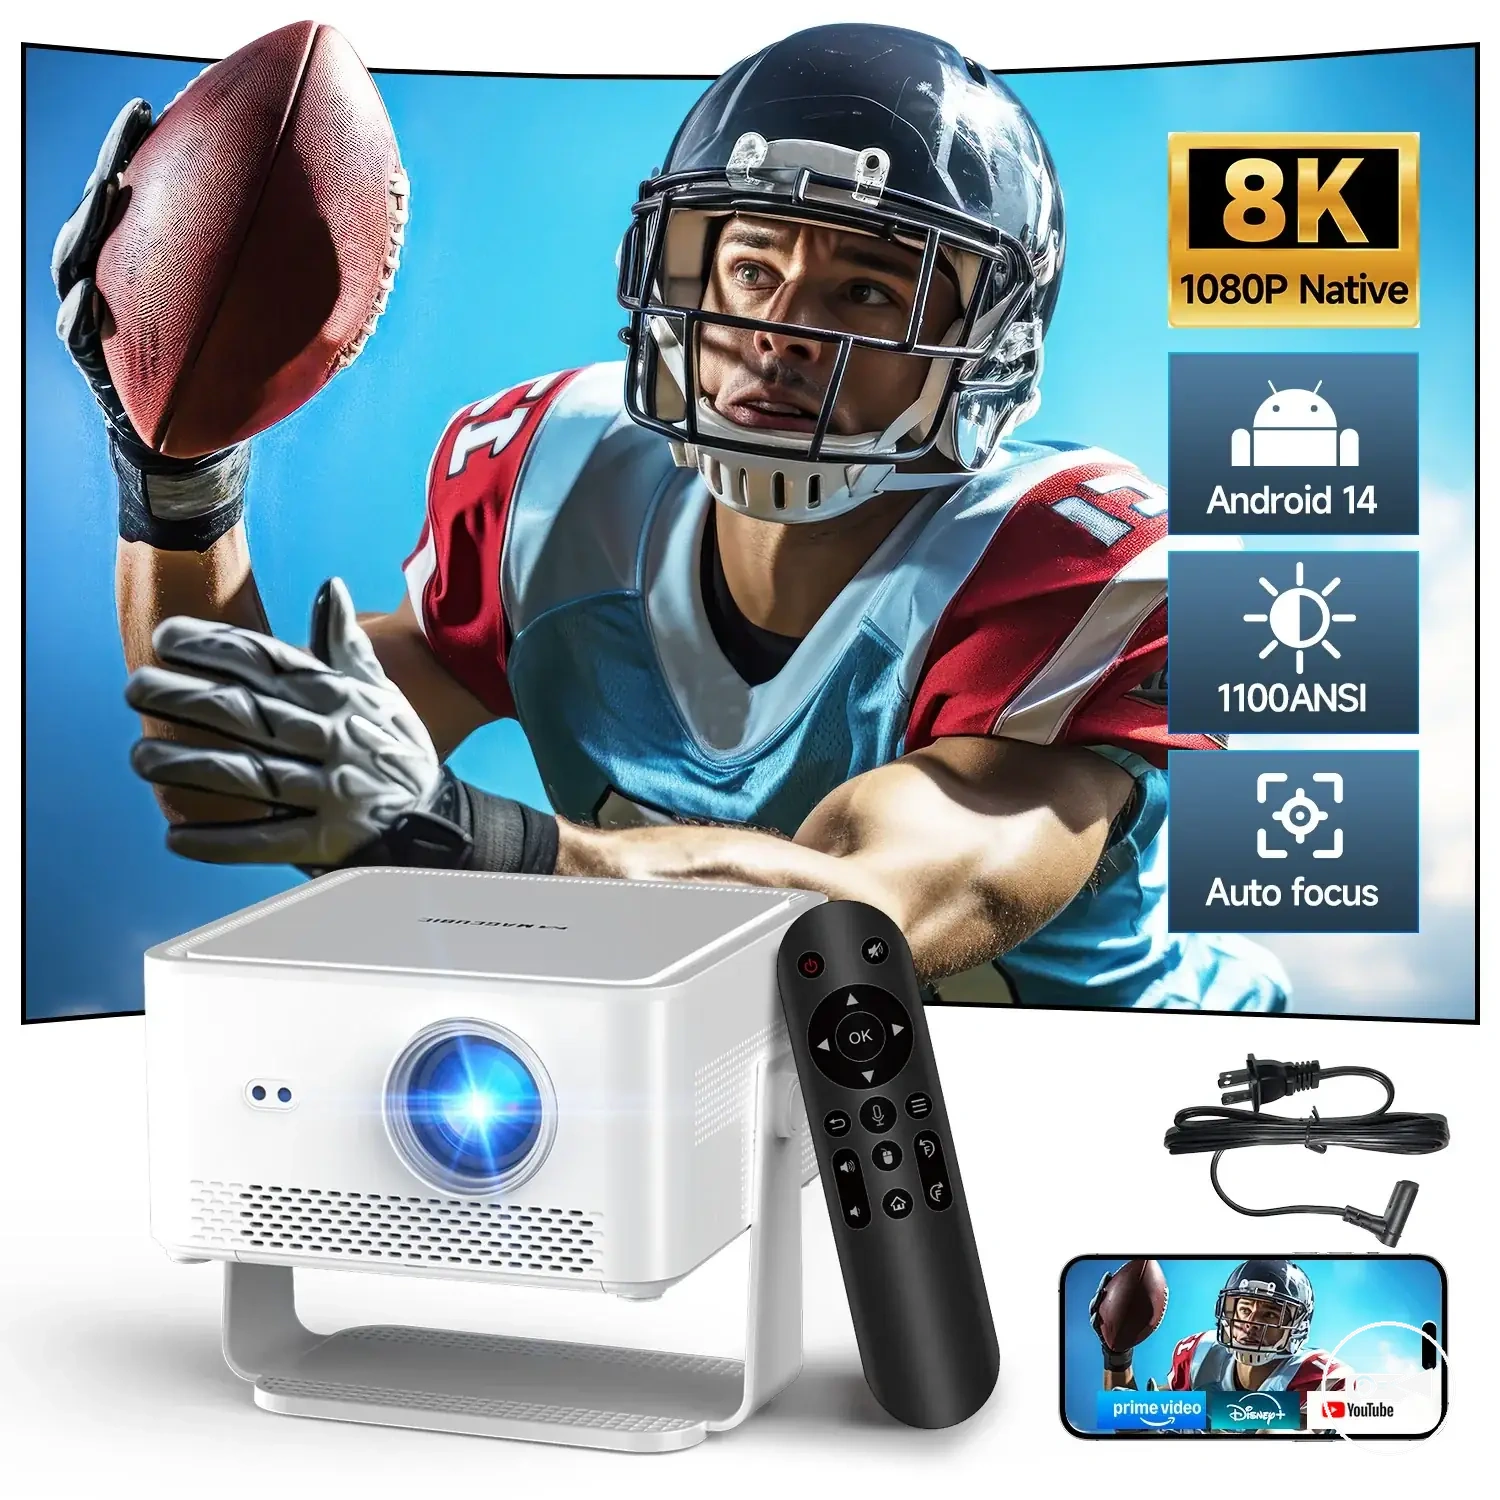
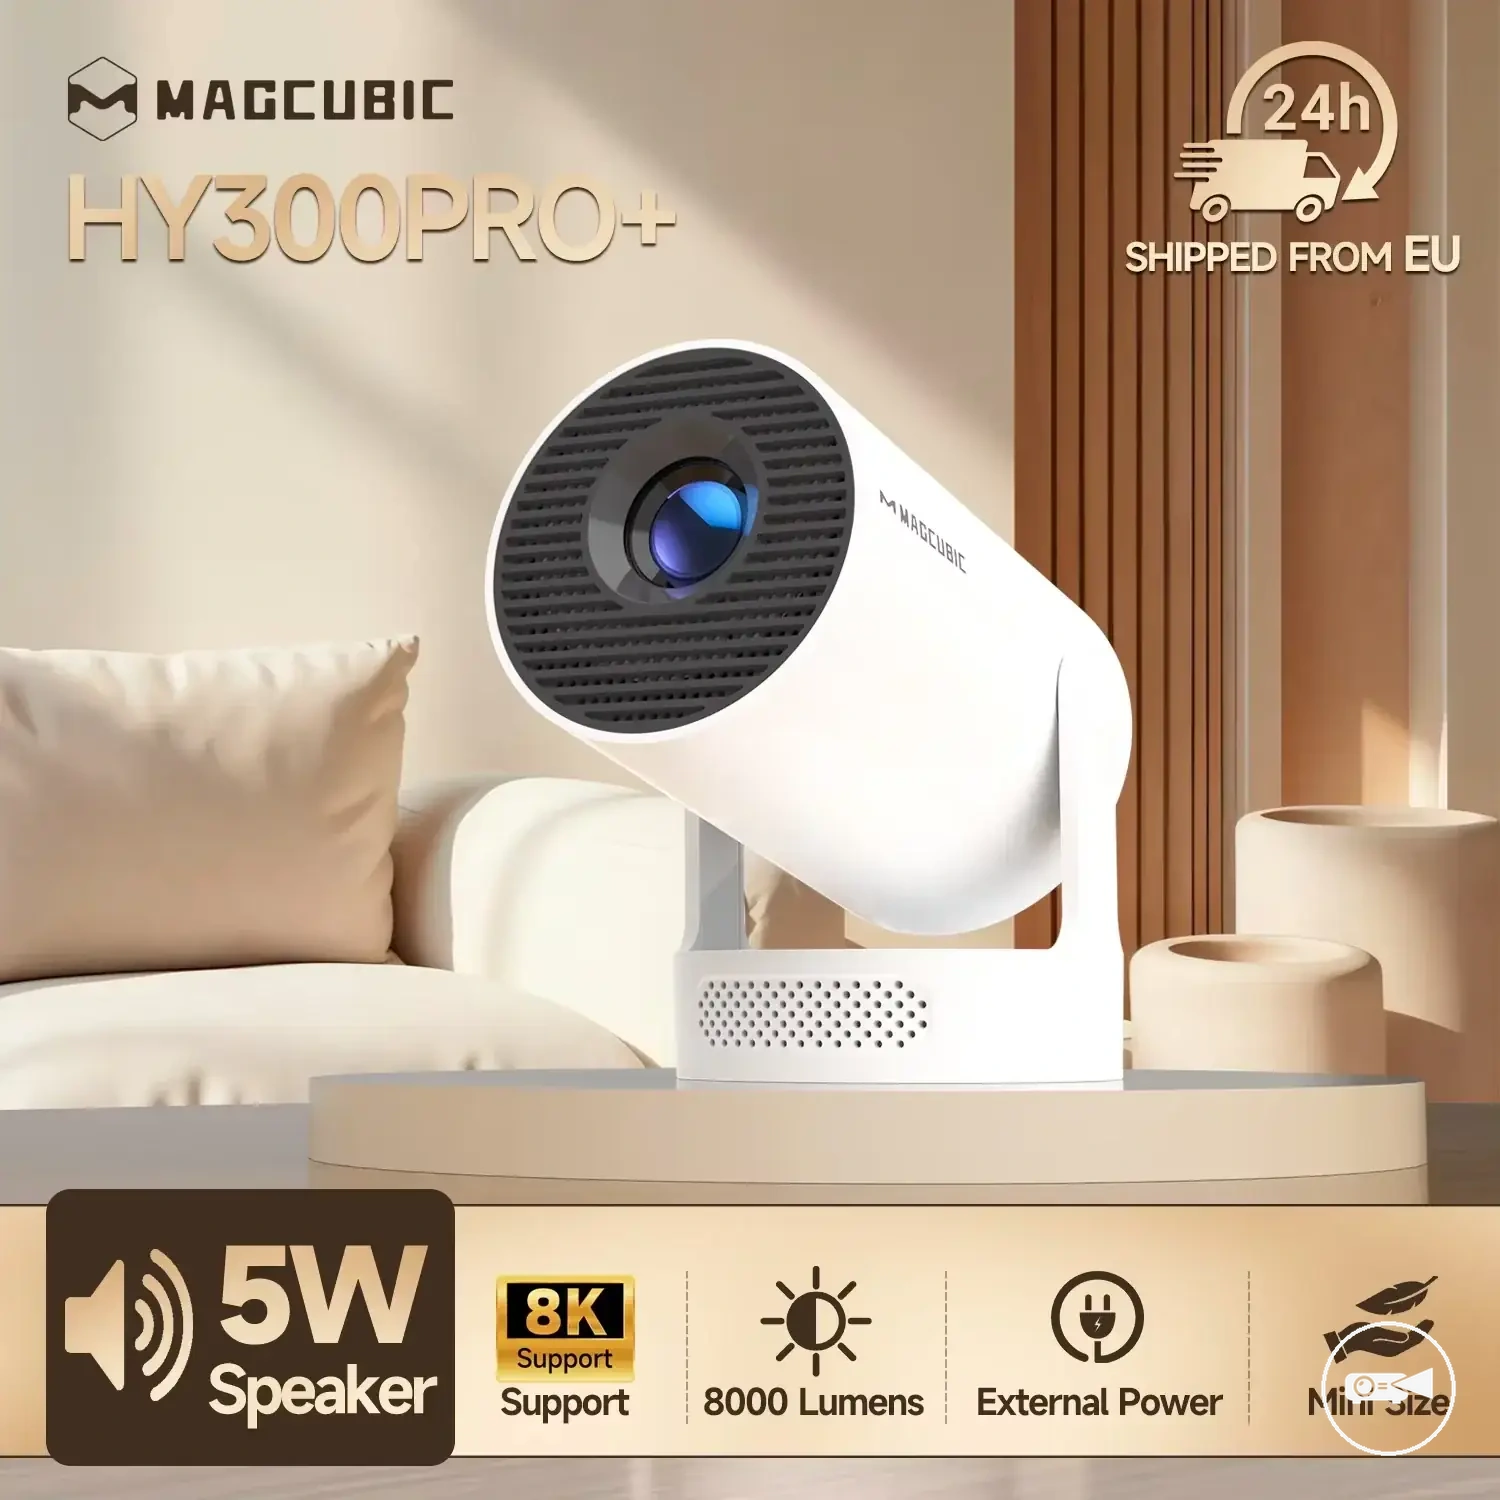
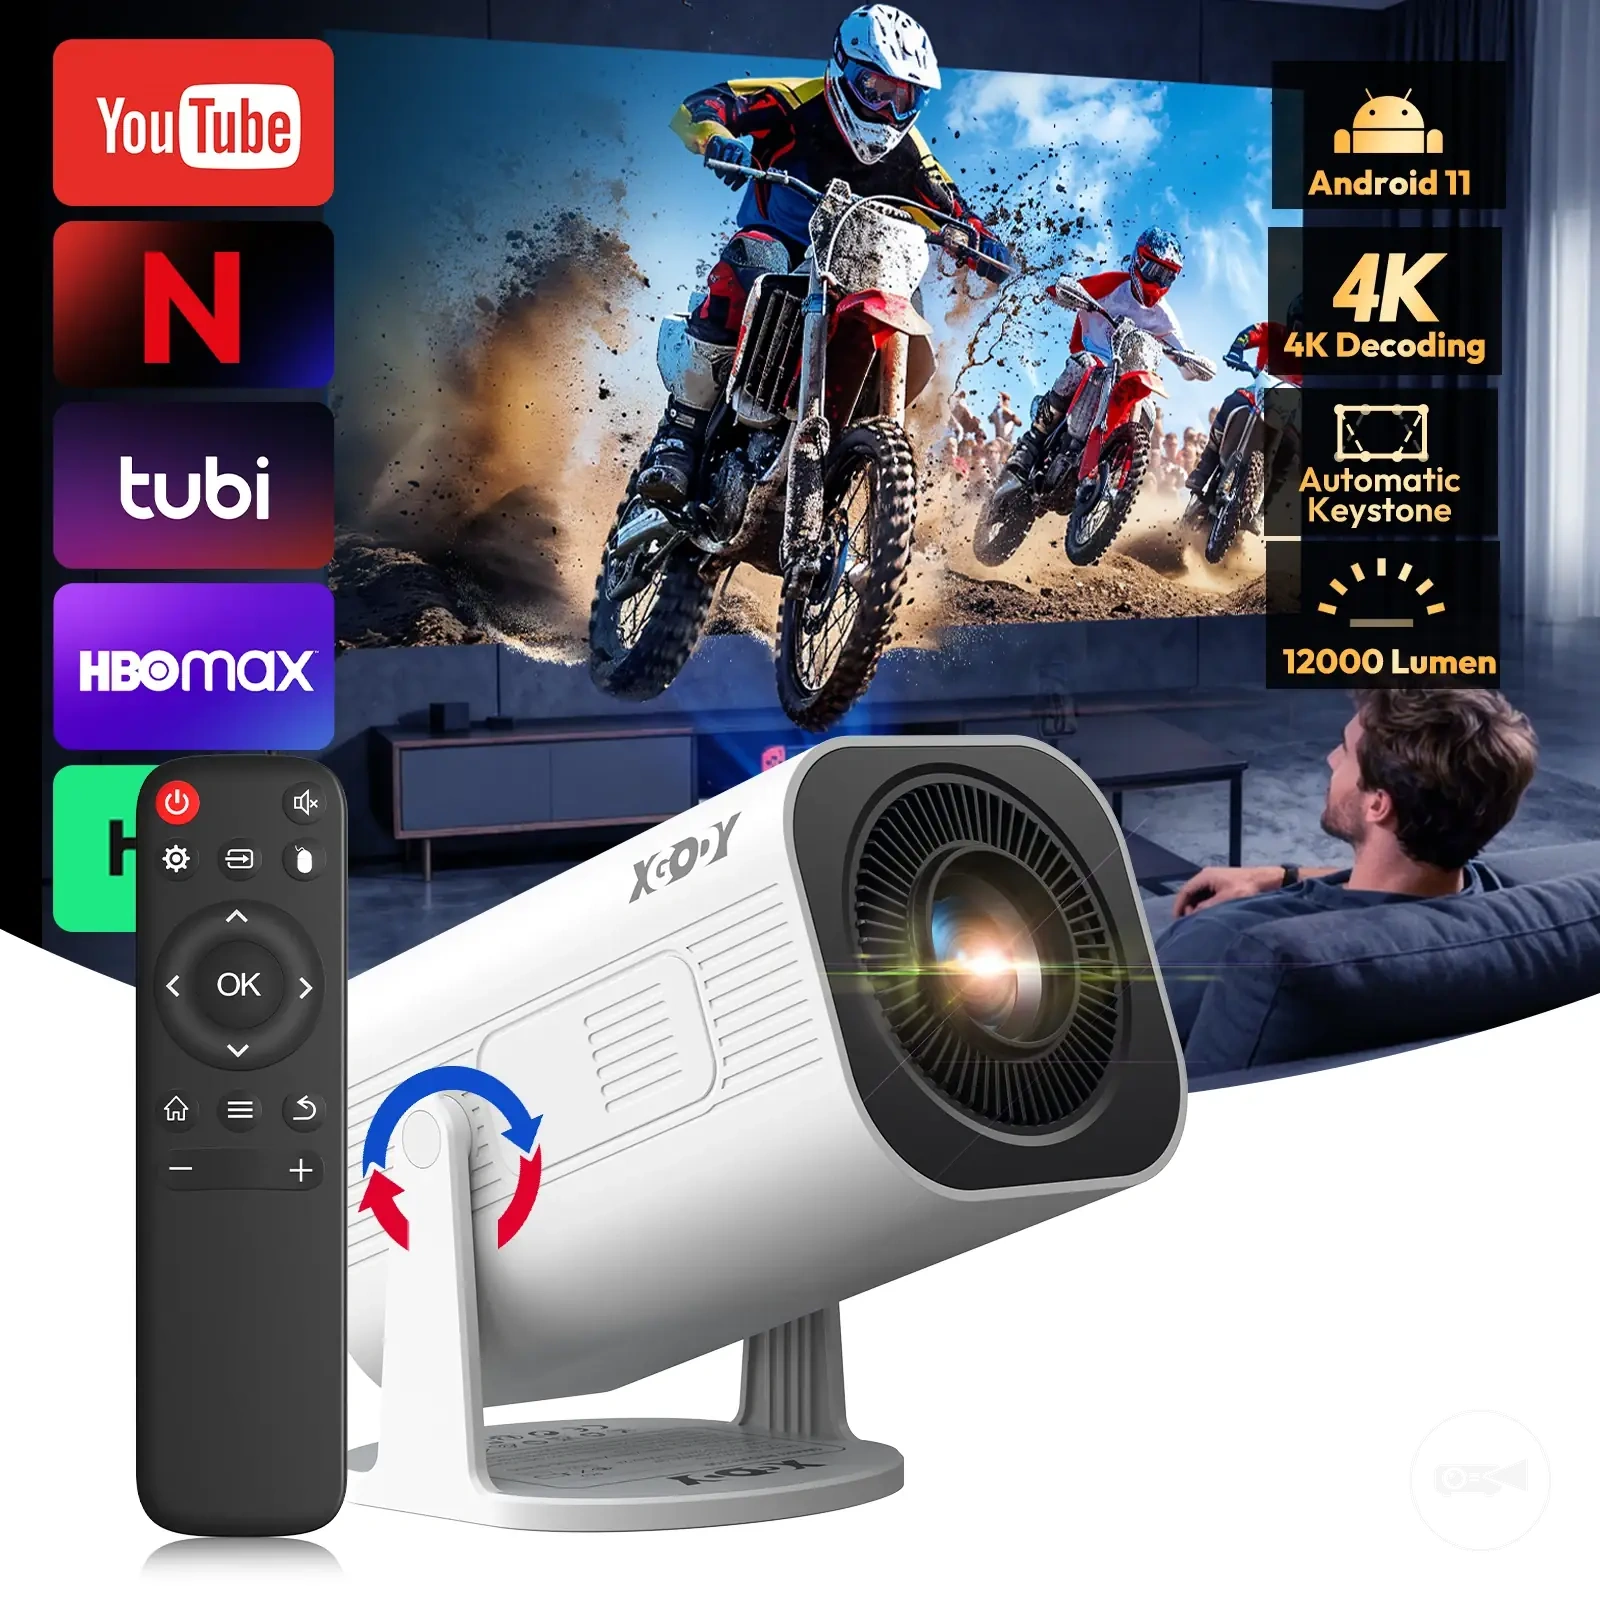
The products below are useful examples for comparing available options.
The products below are useful examples for comparing available options. Before buying, check that the compatibility criteria, key features, and product details match your needs.
Outdoor Use Cases That Fit a Mini Projector Best
Outdoor use cases fit a mini projector when the setup is temporary, the audience is small, the environment is in low light, and the planned session length stays within the available runtime or power arrangement. Under those conditions, outdoor movies, backyard viewing, patio projection, and other casual use scenarios can benefit from portability without requiring a larger permanent setup.
- Small backyard movie nights: Backyard viewing suits a mini projector when the group and screen remain modest, ambient light is limited, and the stated runtime covers the full programme.
- Patio viewing: A sheltered patio can support casual use when the projector has a stable surface, a practical connection to the playback device, and enough audio for nearby seating.
- Temporary screen setups: A portable projector fits a screen that can be positioned, secured, and removed after the session without permanent mounting.
- Travel-friendly projection: High portability is useful when the projector, power source, cables, and playback device can be carried and connected without a complex equipment setup.
- Low-light casual entertainment: Short films, videos, or sports viewing become a practical fit after dusk when the intended screen size remains within the model's usable brightness and projection range.
These scenarios become limited when ambient light is strong, the audience requires a large screen, or the session length exceeds the stated battery runtime without another power source. For example, a short patio screening after dark with nearby seating is a more realistic fit than a large daytime event requiring extended runtime, high brightness, and wide-area audio.
For example, a short patio screening after dark with nearby seating is a more realistic fit than a large daytime event requiring extended runtime, high brightness, and wide-area audio.
Matching group size, light level, screen size, power plan, and portability to the specific mini projector keeps outdoor use within a practical fit instead of treating it as a replacement for every outdoor projection setup.
Limits That May Require a Larger Outdoor Projector
A mini projector reaches its practical limit when the required brightness, large screen size, viewing group, or installation conditions exceed what a compact portable projector is intended to support. In those situations, the trade-off shifts toward a larger outdoor projector rather than extending the mini projector beyond its practical fit.
The comparison below highlights common conditions that help determine whether a mini projector remains suitable for outdoor use.
The comparison below highlights common conditions that help determine whether a mini projector remains suitable for outdoor use.
- Daylight viewing: Strong daylight or heavy ambient light can exceed the usable brightness of a mini projector, making a larger outdoor projector the more appropriate choice.
- Large viewing group: A larger viewing group typically benefits from higher brightness and a larger image so people seated farther away can view the content more comfortably.
- Very large screen: A large screen spreads the available light across a wider surface, reducing perceived image brightness unless higher light output is available.
- Long throw distance: When the projector must be positioned far from the screen, greater optical flexibility and higher brightness can shift the decision toward a larger outdoor projector.
- Loud outdoor spaces: Open environments with substantial background noise can exceed the capability of integrated speakers, making equipment designed for external audio support a better fit.
- Permanent installations: Fixed outdoor viewing areas generally prioritise consistent placement, larger screens, and sustained performance over portability.
For example, a backyard setup for evening outdoor viewing with a modest screen and a small audience remains well suited to a mini projector, while a permanent installation serving a large screen in bright conditions is more likely to require a larger outdoor projector. Recognising these limitation and trade-off signals helps keep the decision focused on whether a mini projector remains the practical choice for the intended outdoor use.